If you sell products that have variants (like colors and sizes), you can list them as one base product with options. Store visitors can select the options they prefer on the product page. The chosen product options are shown in the order details
With the help of product options, you can also:
- offer extras, like gift wrapping;
- ask buyers to upload a file for ordered product/service;
- offer multiple selections to configure the final product;
- and more.
In this article:
Creating options
To add options like Size and Color to your products, do the following:
- Go to your store Control Panel → Catalog → Products.
- Open the product page you want to edit.
- Go to the Options tab:

- Click +Add New Option to add an option and its parameters.
- Add the name of the option, for example, Size.
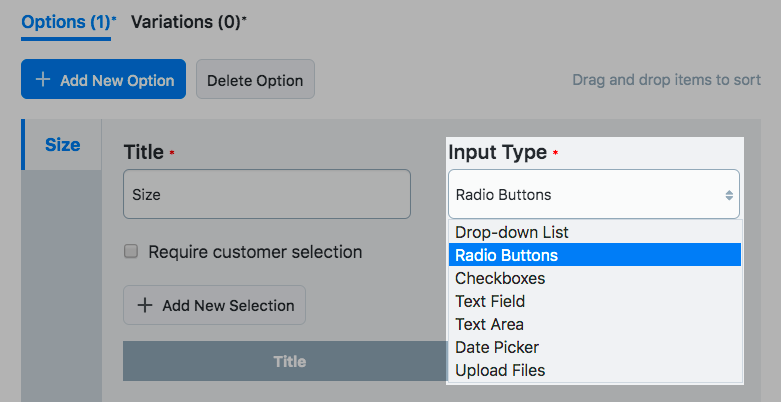
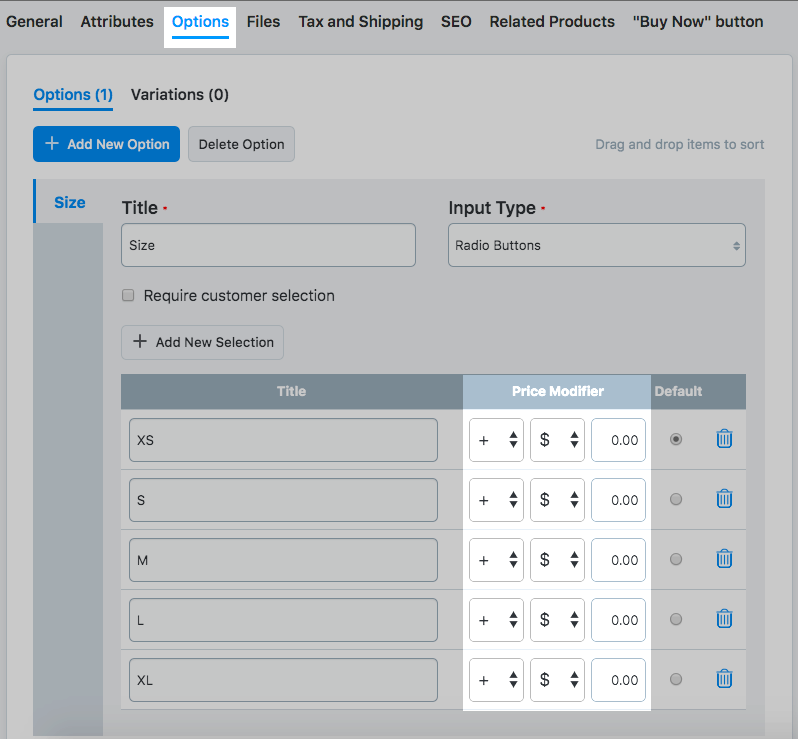
- Select the option type. Radio Buttons work best for Size:
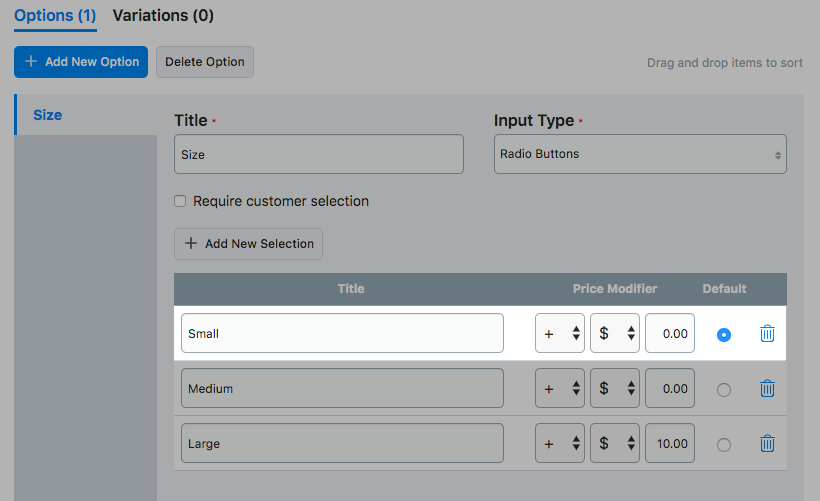
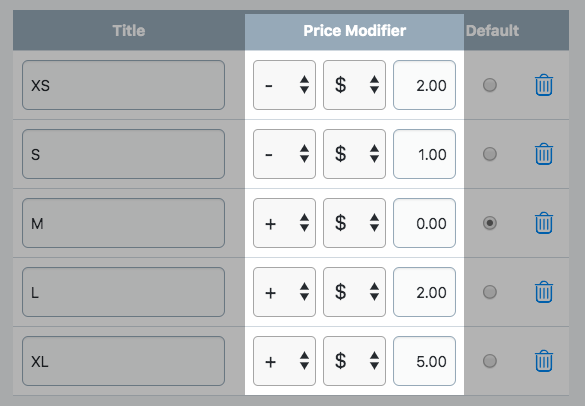
- Click +Add New Selection and add all values of the option. Add as many new selections as you need and specify whether they affect the base product price or not:
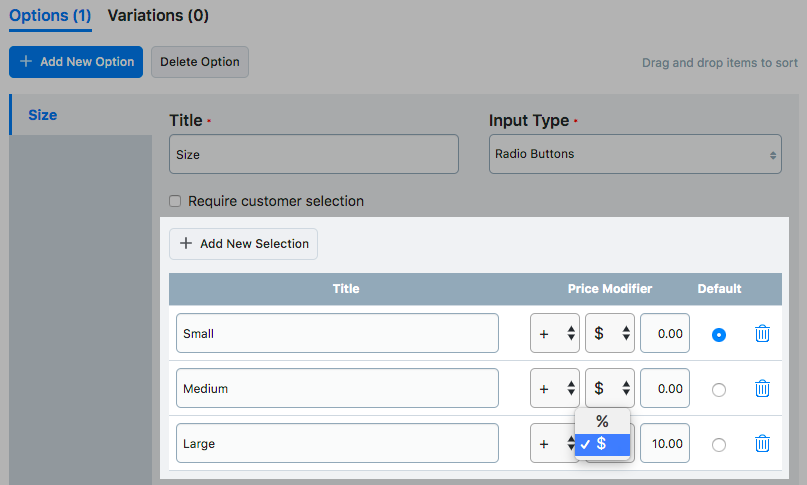
- Choose the Default option (if your option requires a customer selection, the Default column is hidden:

- Save the changes.
Repeat the above steps to add more options (like color), if needed.
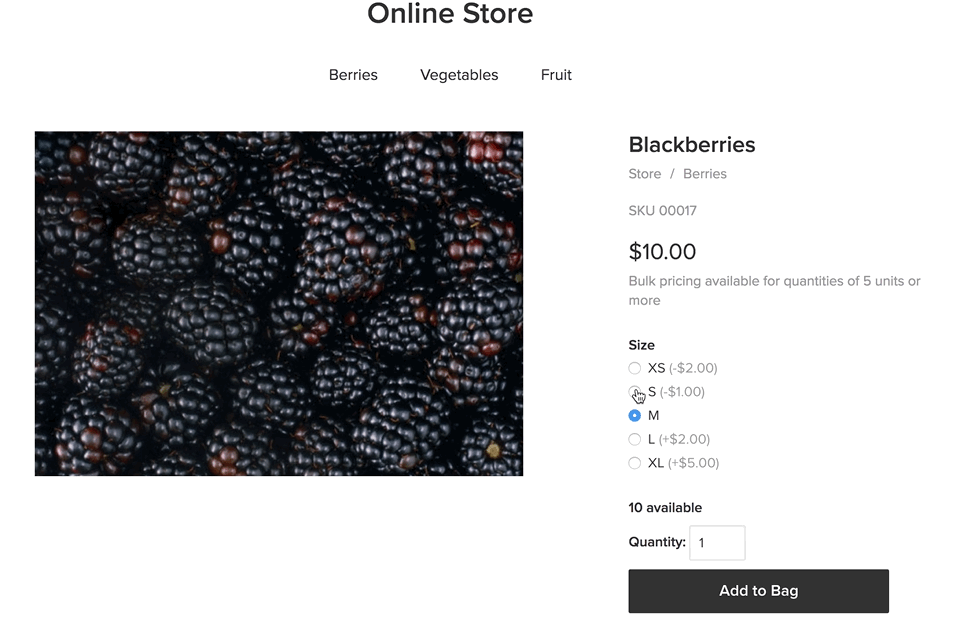
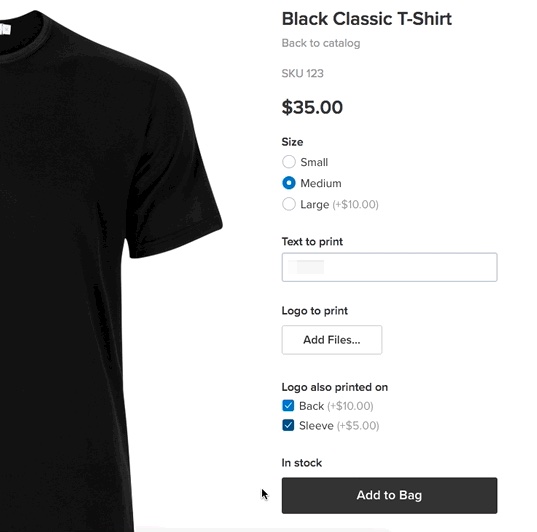
Here is how the options look in the storefront:
Option types
You can use different option types to help customers select a product they desire:
- Drop-down list allows the selection of one value from multiple choices. We suggest drop-down lists for a compact view of many choices.
- Radio-buttons allow selecting one value from multiple choices like colors.
- Size allows selecting one option from multiple size choices.
- Date Picker is a popup calendar to select a date for product/service.
- Text Field and Text Area are input text fields where your customers can type any text for a product. It is often used to offer personalization, engraving, custom printing or embroidery for products.
- Checkboxes allow selection of several options at once. For example, pizza toppings.
- Upload file allows customers to attach files to the product or service they order.
Required options
You can use the Require customer selection option with drop-down lists and radio buttons to ensure customers select an option.
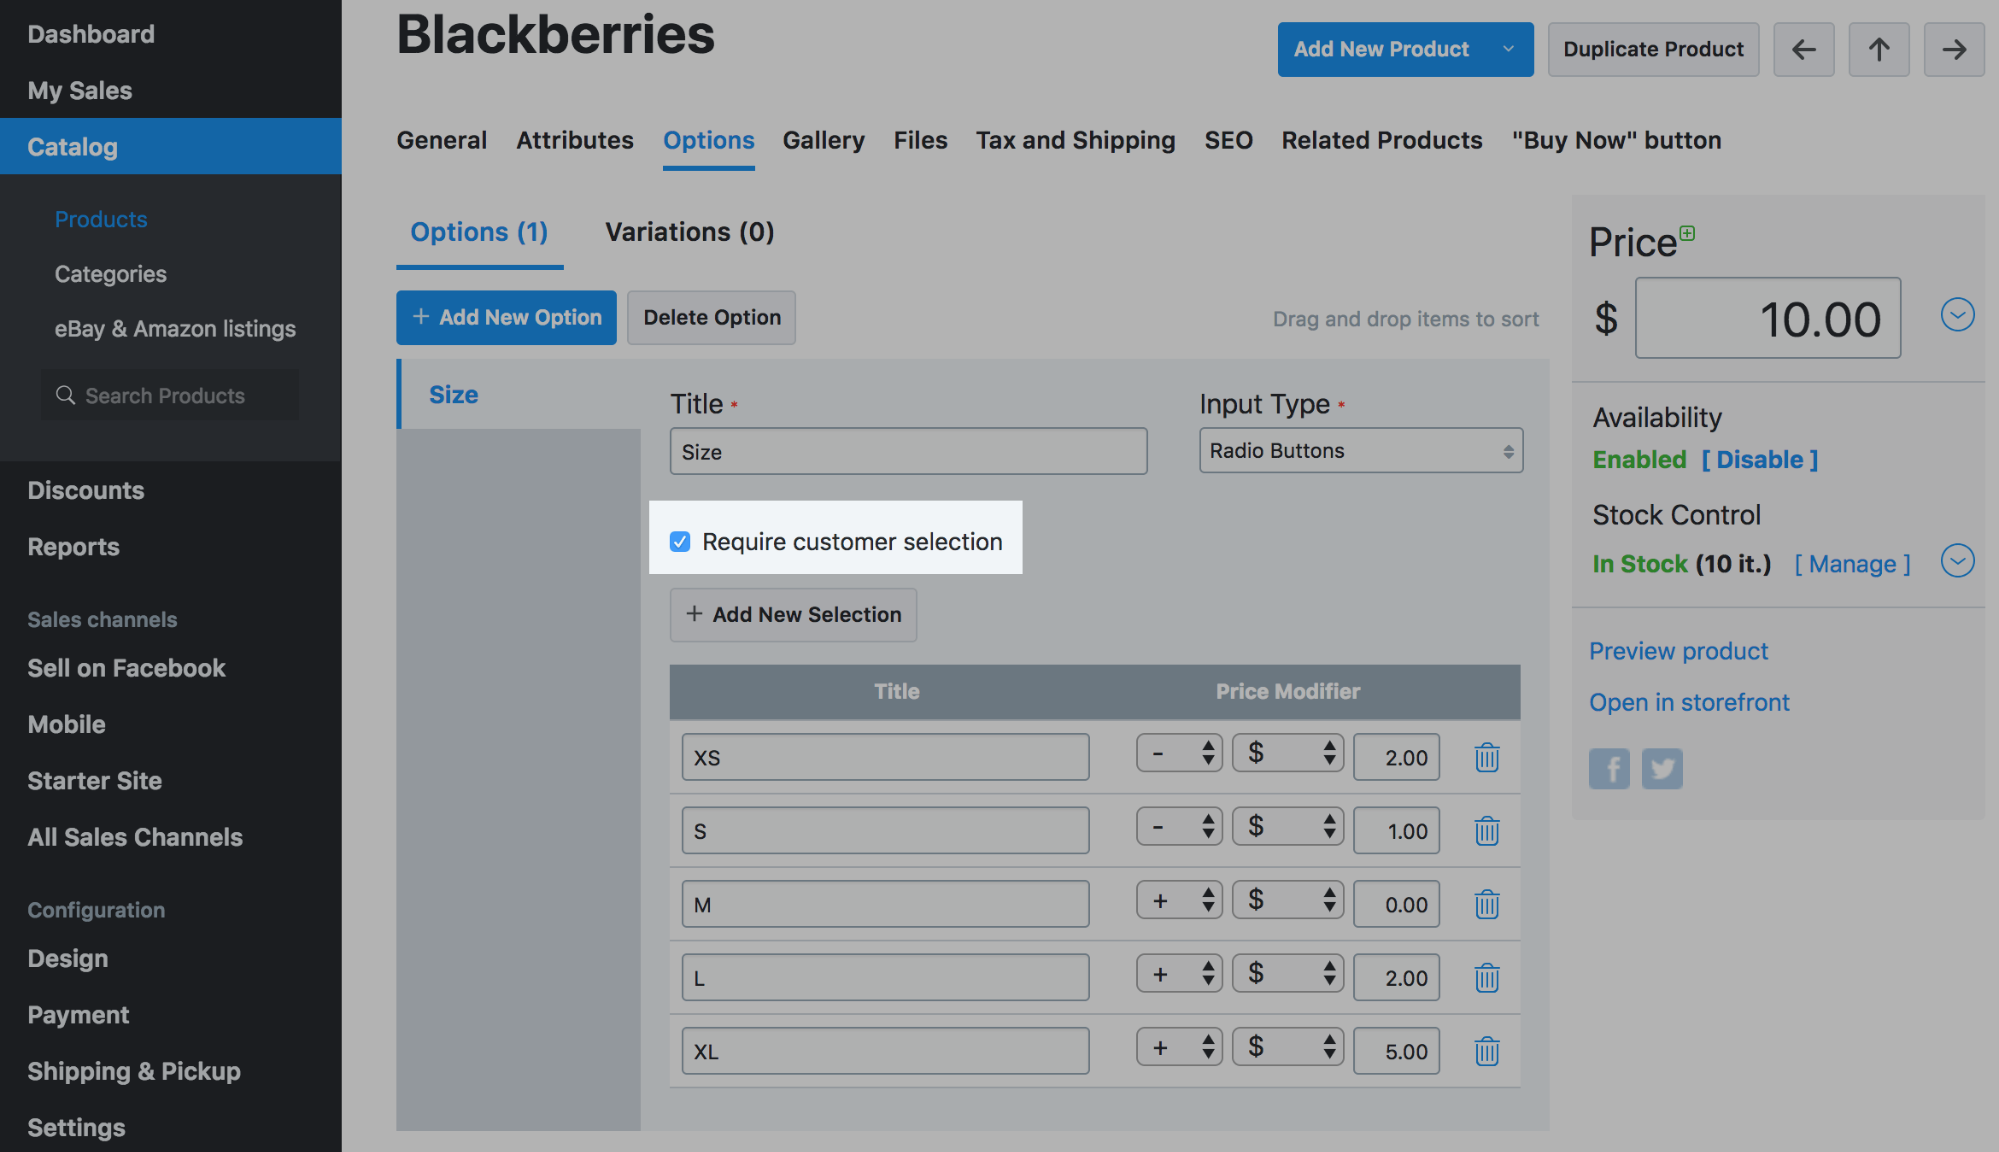
With Require Customer Selection checked, a customer cannot add a product to cart without selecting an option.
Checkboxes cannot be required.Using price modifiers
With price modifiers, you can increase or decrease the base product price depending on options. For example, a cotton T-Shirt may cost $10, while an organic cotton T-Shirt sells for $12. If a customer selects an option with a price modifier, they will see the updated price on the product page.
Price modifiers can be assigned to drop-down, checkbox and radio-buttons option types.
To add price modifiers:
- Go to your store Control Panel → Catalog → Products.
- Open the product page you want to edit.
- Go to the Options tab:
- Select how the price modifier should adjust the price:

- Select whether the modification adjusts the price in absolute amount or as a percentage:

- Set the amount.
- Save the changes.
This is how the price modifiers appear in the Control Panel:
This is how your customers see modifiers in your storefront. The price changes immediately when you select an option: