Authorize.Net is a world known and trusted payment provider that allows you to accept credit and debit cards in your online store.
To use Authorize.Net SIM payment method in your store, you need to obtain a merchant account with Authorize.Net and configure this payment method in your Control Panel.
In this article:
Configure Authorize.Net payment method
To configure Authorize.Net as your payment method:
- Obtain a merchant account with Authorize.Net or skip this step, if you already have one.
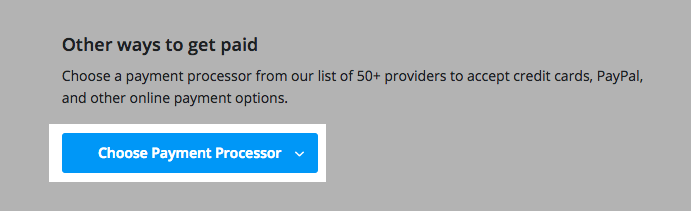
- Go to your Control Panel → Payment.
- Click Choose Payment Processor at the bottom of the page.
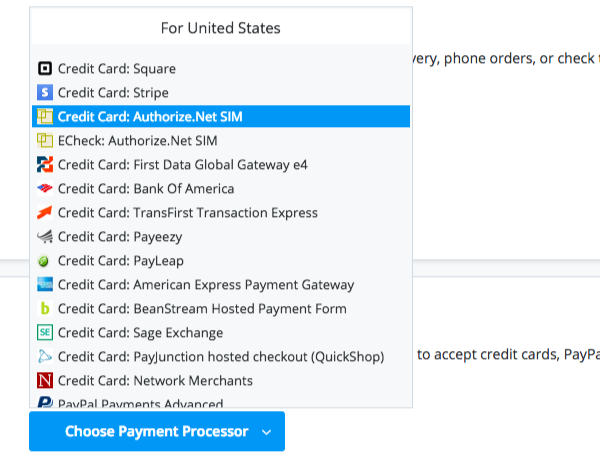
- Select Credit Card: Authorize.Net SIM from the drop-down menu.
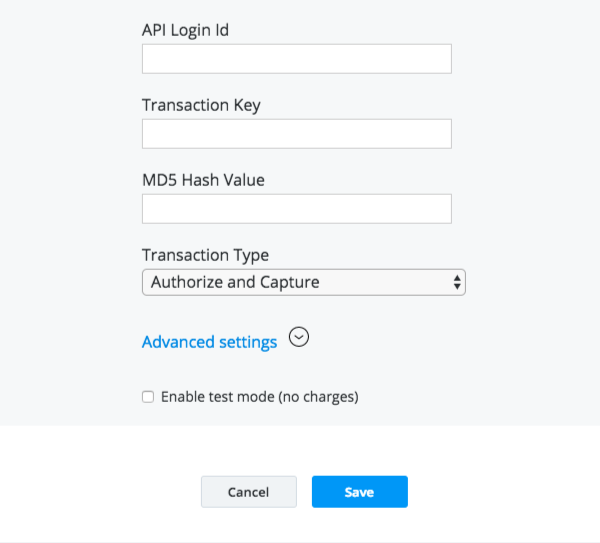
- Select the Transaction Type.
- Authorize only
This transaction type will not be sent for settlement until you capture the funds manually in your Authorize.Net merchant account. - Authorize and Capture
This is the most common type of credit card transaction when the amount is sent for authorization, and if approved, is automatically submitted for settlement.
- Authorize only
- When you have entered your account credentials, click Save.
Use Authorize.Net in test mode
If you want to use Authorize.Net in test mode, you need to sign up for a sandbox account with Authorize.Net and enable the test mode for this payment method in your Control Panel.
To configure Authorize.Net in test mode:
- Obtain a sandbox account with Authorize.Net or skip this step, if you already have one.
- Go to your Control Panel → Payment.
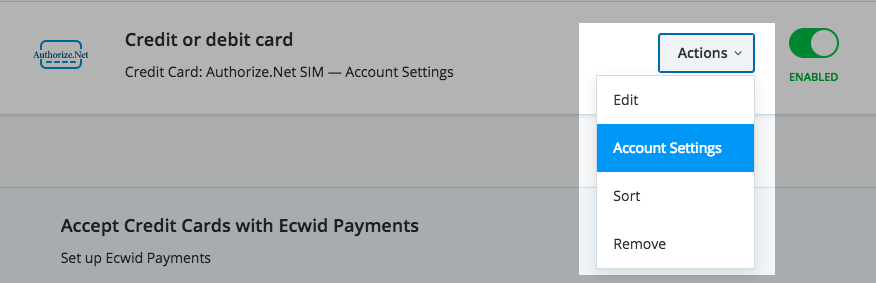
- Click Actions and then Account Settings next to the Authorize.Net payment method.
- Enter the credentials of your sandbox account.
- Click Advanced settings and enter https://test.authorize.net/gateway/transact.dll as your Endpoint URL.
- Check the option Enable test mode.
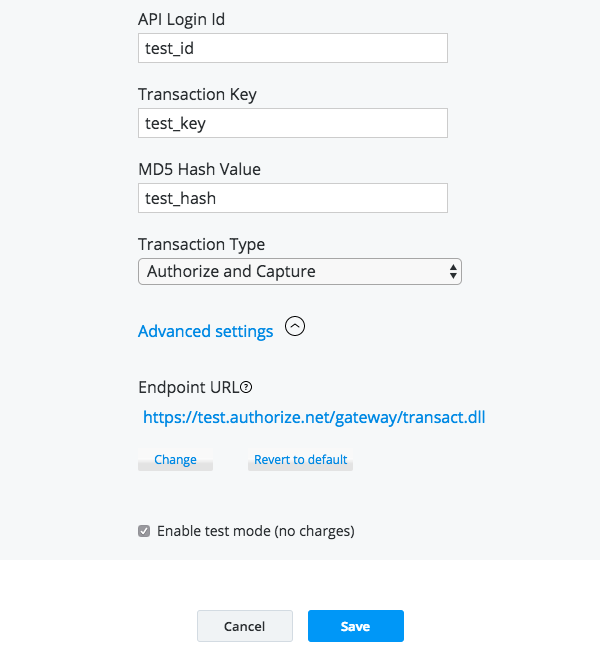
- Click Save.
Troubleshooting
We have collected here the most common errors that you may get, if your Authorize.Net payment is configured incorrectly and how you can solve them.
Authorize.net FDC Merchant ID or Terminal ID is incorrect
This is a non-store error. It indicates that there is an issue with your Merchant Service Provider that configured up your Authorize.Net account or with your Authorize.Net account itself.
Please report this error to the Authorize.net customer support.
(123) This account has not been given the permission(s) required for this request
Please make sure that you use the correct API Login ID for Authorize.Net account credentials in your Control Panel → Payment.
(99) This transaction cannot be accepted
This error means that the account credentials you entered for Authorize.Net payment method in your Control Panel are not valid.
Please, make that the Transaction Key you entered for Authorize.Net payment method in your Control Panel matches the current Transaction Key in your Authorize.Net merchant account.
(13) The merchant login ID or password is invalid or the account is inactive
This error means that the account credentials you entered for Authorize.Net payment method in your Control Panel are not valid.
Please, make that the credentials you entered for Authorize.Net payment method in your Control Panel match with your live Authorize.Net merchant account.
If you use a sandbox account, ensure that is configured correctly.
(14) The referrer, relay response or receipt link URL is invalid
This error means that the Relay Response/Receipt URL in your Authorize.Net merchant account doesn’t match the Relay Response/Receipt URL sent by with the transaction details.
Please, edit the Relay Response/Receipt URL in your Authorize.Net merchant account:
- Log in to your Authorize.net merchant account.
- Go to the Receipt/Response URLs page.
- Click Add URL.
- Enter https://app.shopsettings.com/authorizenet/STORE_ID (where STORE_ID is the ID of your account) to the URL field.
- Click Submit.