Pre-orders let your customers place orders for products that are out of stock, have not been produced yet or are not available right now for some other reason.
pre-orders help you learn more about your customers’ demand. Besides, with pre-orders you can get a certain amount of sales before the goods are available in the store.
In store you can collect pre-orders from customers without charging them until the products are shipped.
In this article:
Why use pre-orders
Certain types of businesses may require offering pre-orders to customers. Collecting pre-orders may be useful if you produce items yourself and start the production only after the order is placed. It is especially convenient when you create custom goods that have individual size, color or material.
Besides, instead of buying products and selling them afterwards you can open your store as a catalog without having goods in stock and collect pre-orders first. As soon as you receive a pre-order you can place the order with the manufacturer or the wholesalers. This approach allows you to save money on the initial investments.
Another example of using pre-orders is when you are planning a release of a book, a computer game or a work of art or any other product in high demand. You can announce that the product will be available soon and allow fans to place pre-orders to make sure they get their item.
Ways to collect pre-orders manually
In case the app does not suit you, you collect pre-orders manually, To achieve this you need to change labels for “Add to Bag” buttons in product pages or create a custom “Place a pre-order” button.
Adding pre-order labels to products
If you use only offline payment methods (wire transfer or cash on delivery) collecting pre-orders is easy.
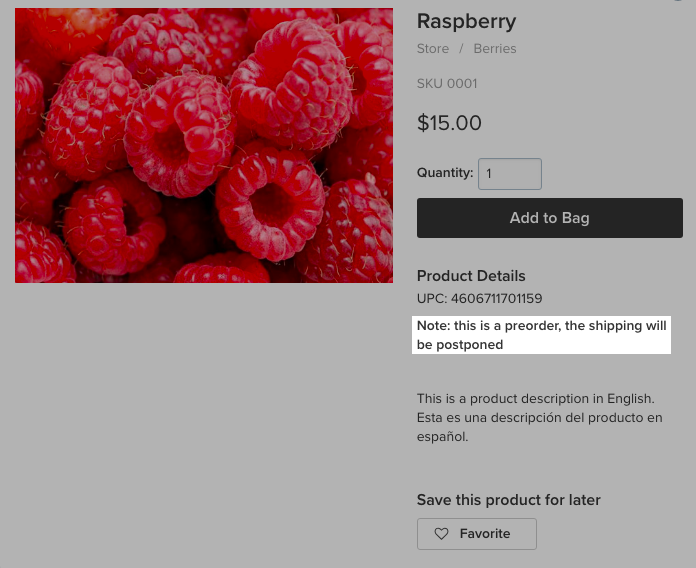
All you need to do is inform your customers that certain products can only be pre-ordered. You can do it with a note in the product page.
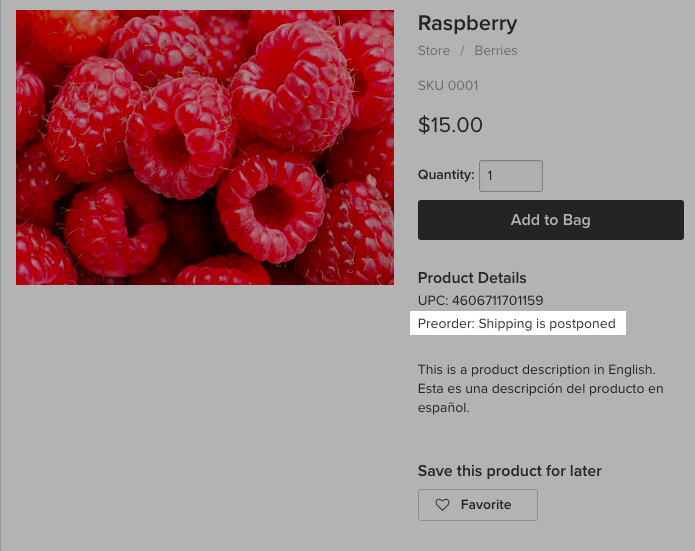
So when ordering, customers will see a note that this is a pre-order, so you will not ship the product right away.
Below are workarounds you can use to add the corresponding note to your product.
Variant 1: use the description field to let the customers know that this product can only be pre-ordered:
- Go to your store Control Panel → Catalog → Products.
- Open the product you want to edit.
- Open the General tab.
- Add the text into the Description field:
Variant 2: add the notification for customers to product attributes. To achieve this proceed with the steps below:
- Go to store Control Panel → Catalog → Products
- Open the product you want to edit.
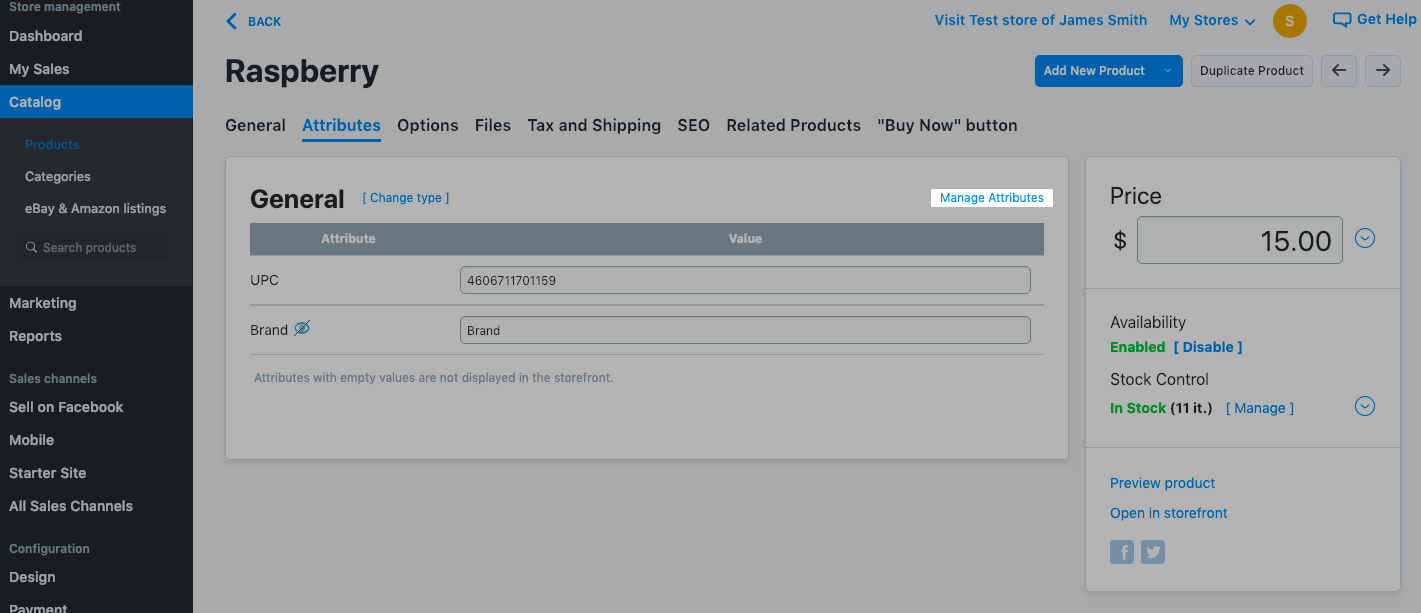
- Open the Attributes tab.
- Click Manage attributes:
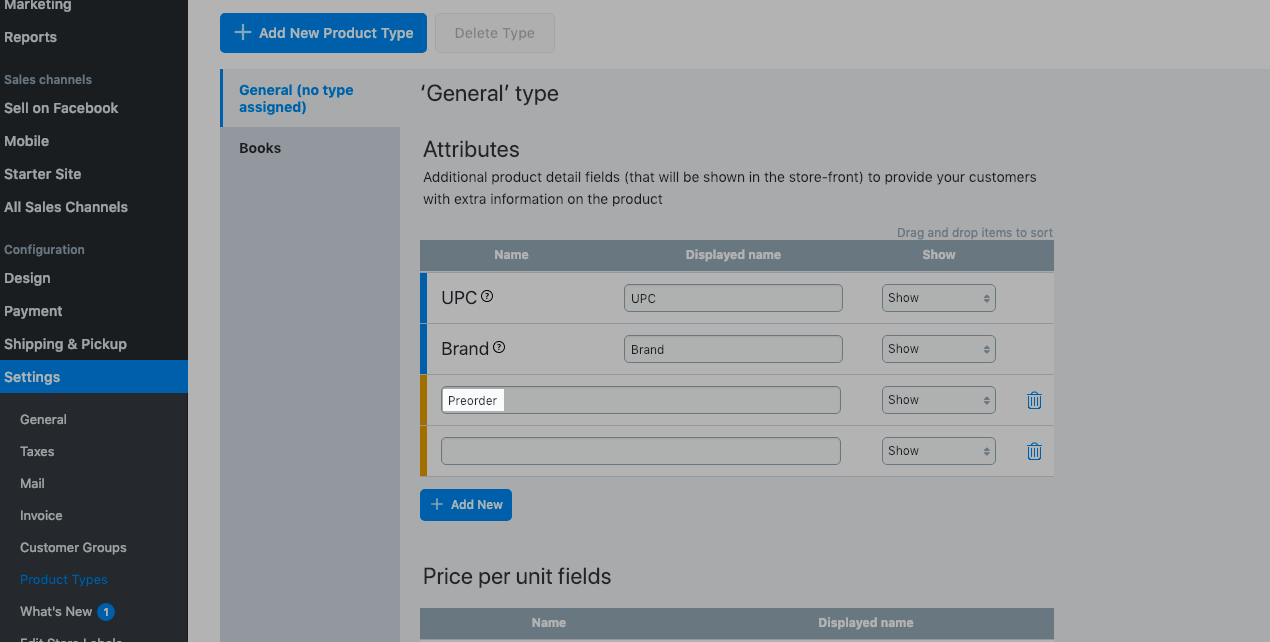
- Add a new attribute, e.g. “pre-order” and save the changes:
- Go back to store Control Panel → Catalog → Products
- Open the product you want to edit.
- Open the Attributes tab.
- Add a note that shipping will be postponed:
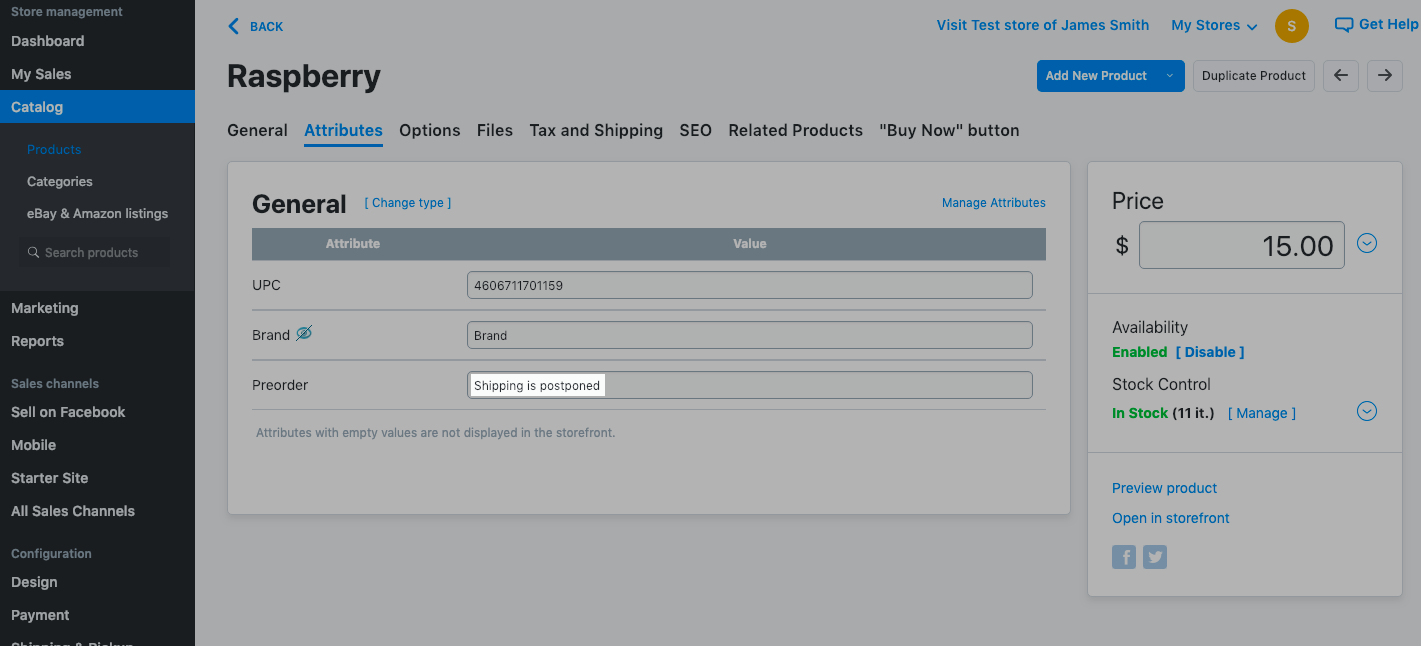
As a result, your product will look like this:
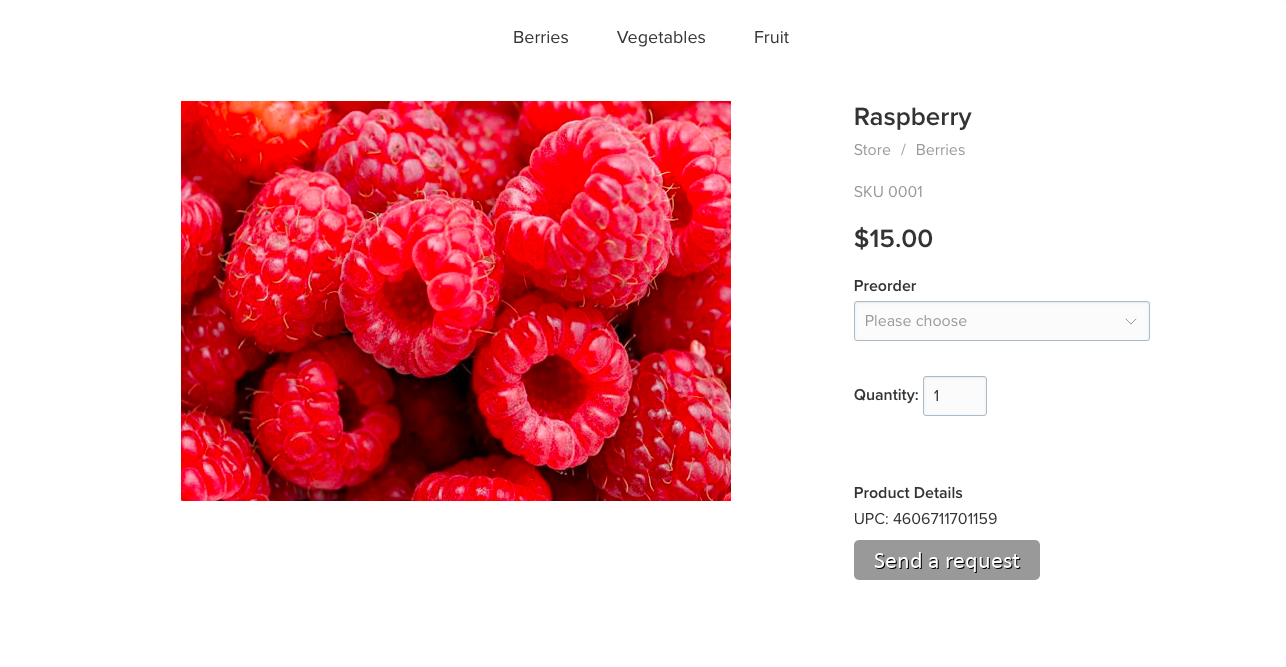
Variant 3: create a product option to get a confirmation from customers that they agree to place a pre-order and they are aware that shipping will be postponed. In this case customers will have to select the option from a drop-down before placing an order.
- Go to store Control Panel → Catalog → Products.
- Open the product you want to edit.
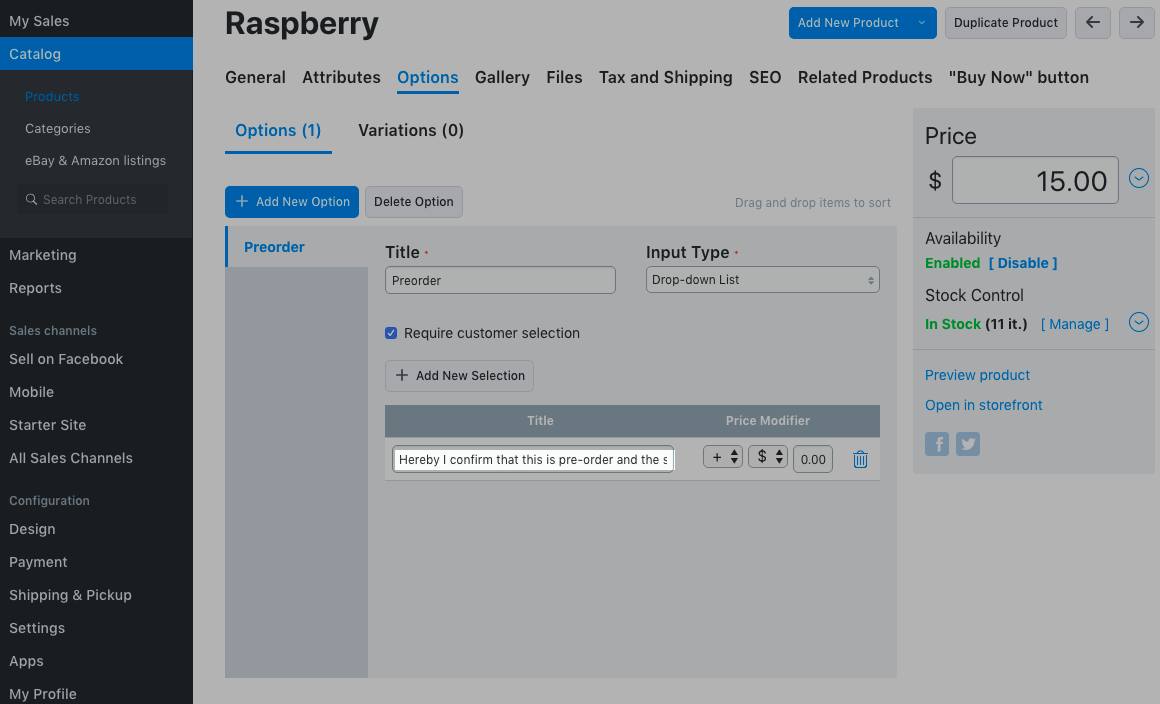
- Open the Options tab.
- Click Add new option.
- Type “Pre-order” notification as the option title.
- Choose Drop-down list as the input type.
- Tick Require customer’s selection.
- Add a new selection and call it “Hereby I confirm that this is pre-order and the shipping will be postponed”:
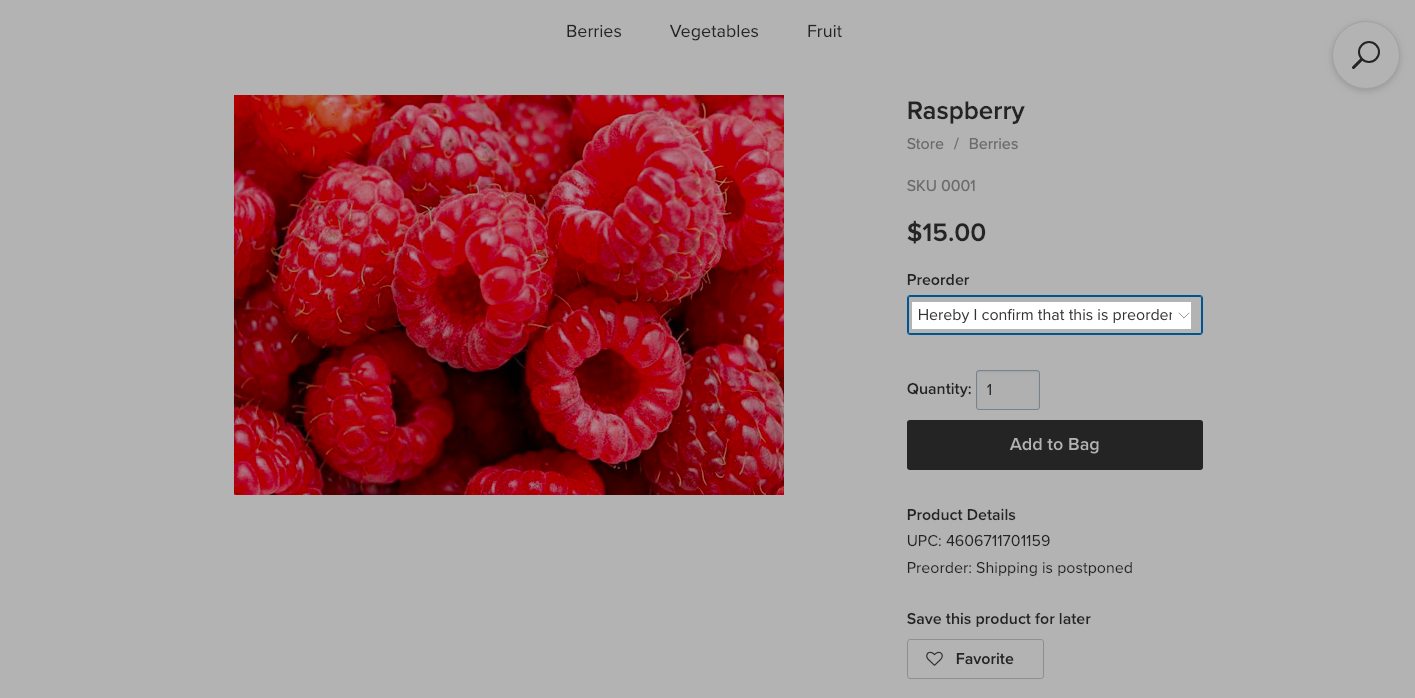
As a result, your customers will need to confirm they are aware that they are pre-ordering the product:
 ng order will appear in your store Control Panel → Sales → Orders page.
So when you are ready to ship these products, you need to call your customers or send them an email about that.
Creating a custom “Place a pre-order” button
You can create a custom button to let customers send enquiries about certain products. This button will be displayed in the product page. After a customer clicks the button they are prompted to send you an enquiry.
Below is the step-by-step instruction that will help you to set it up.
Remove the Add to bag buttons
Remove the button with the help of CSS.
Create a button to enable your customers send enquiries
Then you need to create a custom button:
- Go to store Control Panel → Catalog → Products.
- Open the product you want to edit.
- Open the General tab.
- Find the Description field.
- Switch to the HTML mode in by clicking the <> sign:
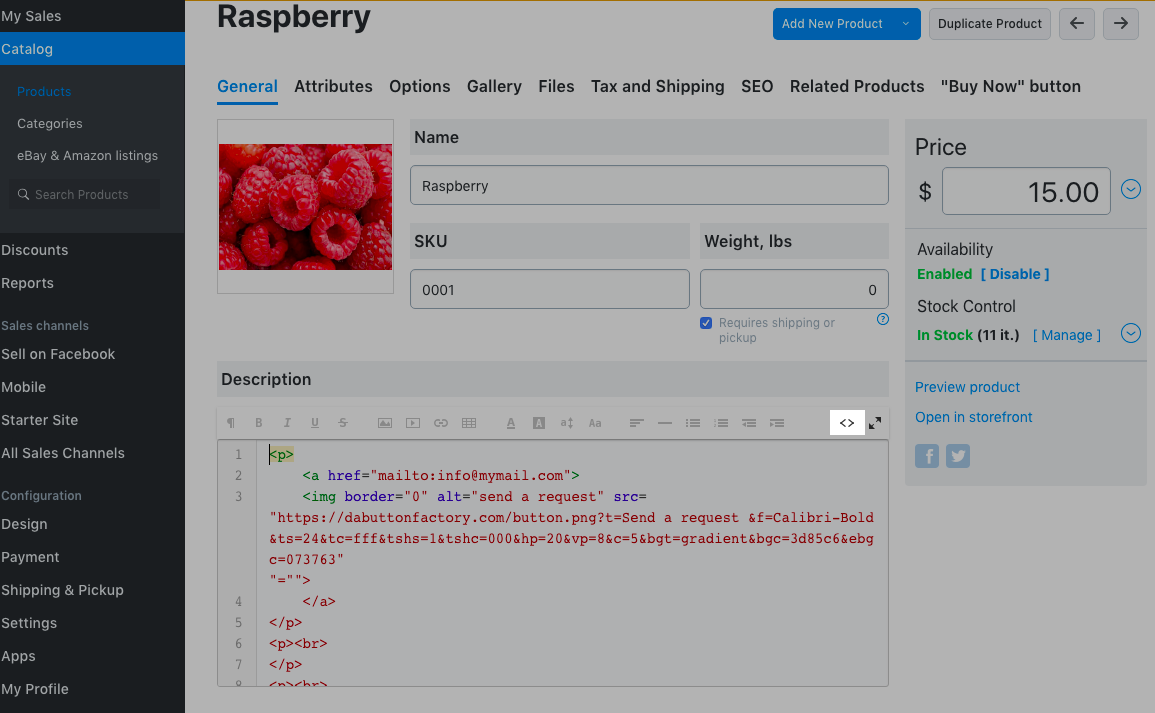
- Then copy the below code and paste it into the Description:
- Save the changes.
Your product page will look like this:
When your customers click the button they are prompted to send you an email with their enquiry.