You can personalize your ShopNow to reflect your brand and present your business to customers from the best angle using the customizable content blocks and cover images. You can use all the sections provided, or combine those that work for you
In this article:
- Store Name and Address
- Headline and Cover Image
- Store Header
- Story
- Customer testimonials
- About
- Location
- Contact information
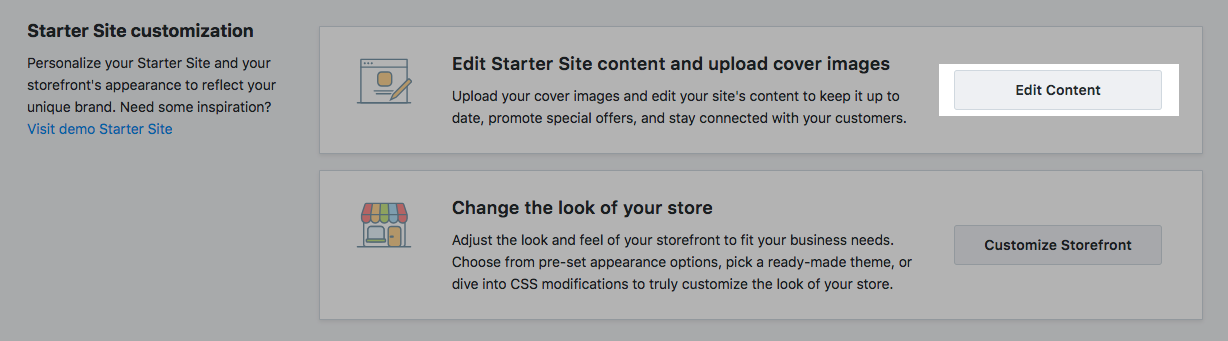
To edit your Storefront content blocks go to the your store Control Panel → WebsSite and click the Edit Content button:
Store Name and Address
You can link your Storefront to a free subdomain, in case you don't have your own domain yet. Enter the name you prefer for your web address to the text field:
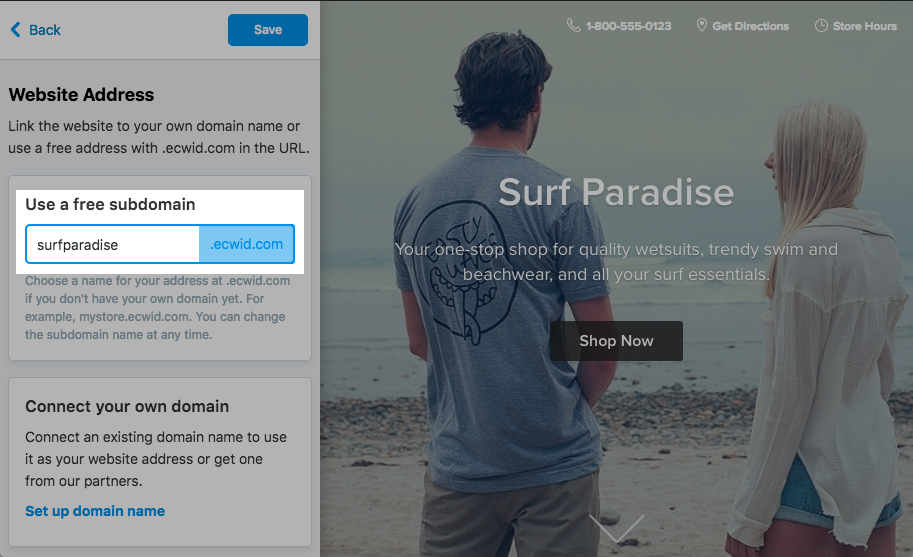
If you have your own domain, click Set up domain name to use it as your web address.
In this section you can also enter the name of your store that will be displayed on the store pages, invoices and in email notifications.
Headline and Cover Image
The Headline represents your brand image and is the first thing your customers see when they visit your store. Here you can use the name of your store, a slogan, or a greeting.
In the Description field you can enter a brief information about your store, as well as list your special offers, announce some promo events, or share the promo codes. Although the field is optional, we recommend to fill it out for better SEO rankings. The text that you enter here will be used for the site’s meta description tag, therefore you can improve your Instant Site SEO if you use some keywords relevant for your business niche in the description.
For the Cover image you can upload a picture of you or your store team, an image featuring your goods or any other picture that will attract your potential customers and give them a positive impression about your business.
The recommended file size for the Cover image is 1000 x 667 pixels or larger, in JPG, PNG or GIF format.You can add the Shop Now button to this section that will take customers right to the product listing.
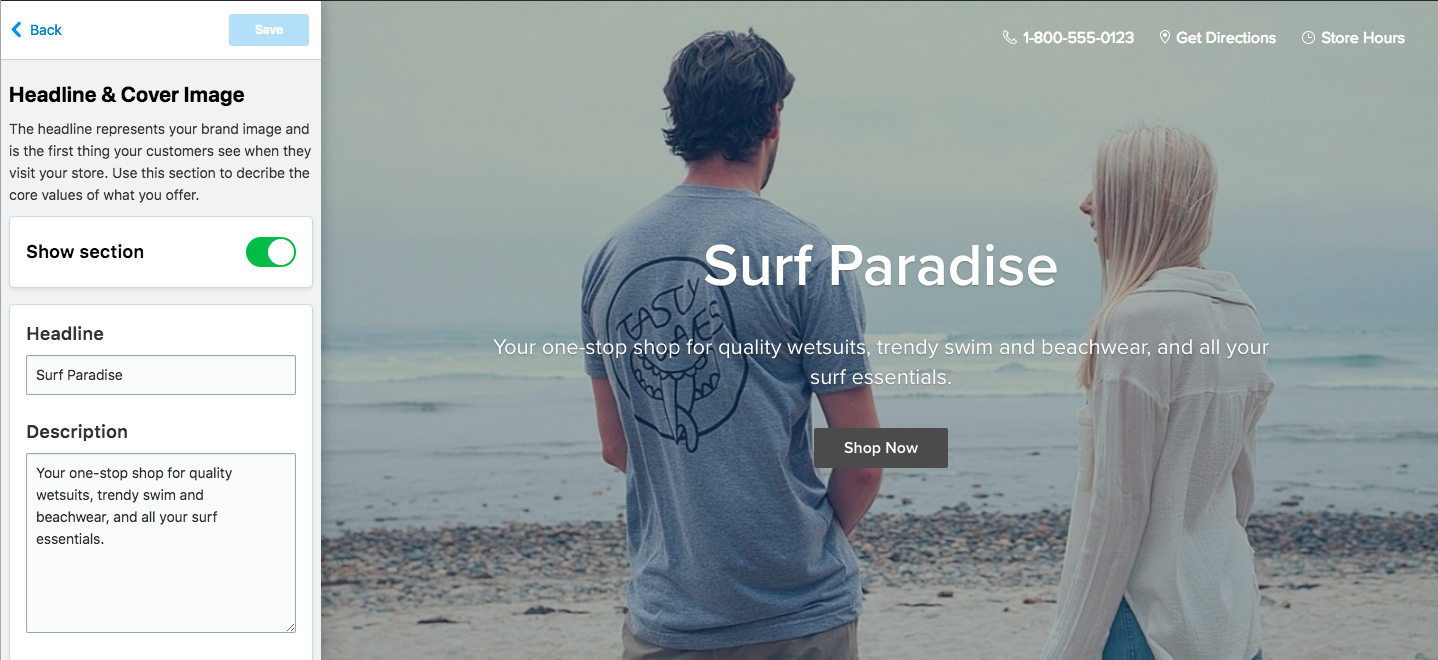
You can hide the whole section if you do not need it by disabling the toggle Show section.
Store Header
Here you can upload the logo that will be displayed to customers on the store’s pages, invoices and in email notifications.
Story
You can use this section to share the story of your business, how it has started, why you have picked this niche. You can also describe the advantages of your products, how your customers can benefit from your store, the goals you are trying to achieve with your business and anything else that would help customers understand your values.
Enter your text to the Section description field and click Change section title to enter the name of the section.
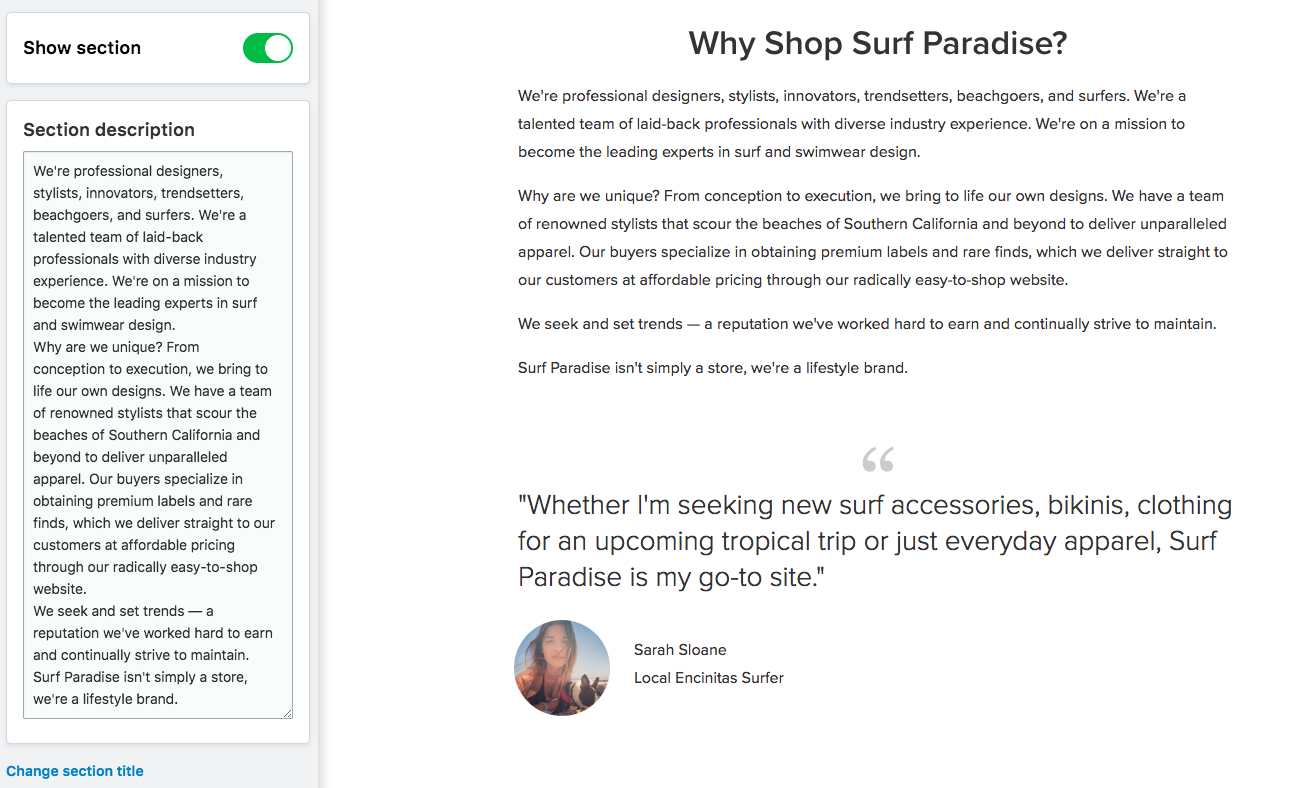
If you don’t want to display your business story, you can hide it by disabling the Show section toggle.
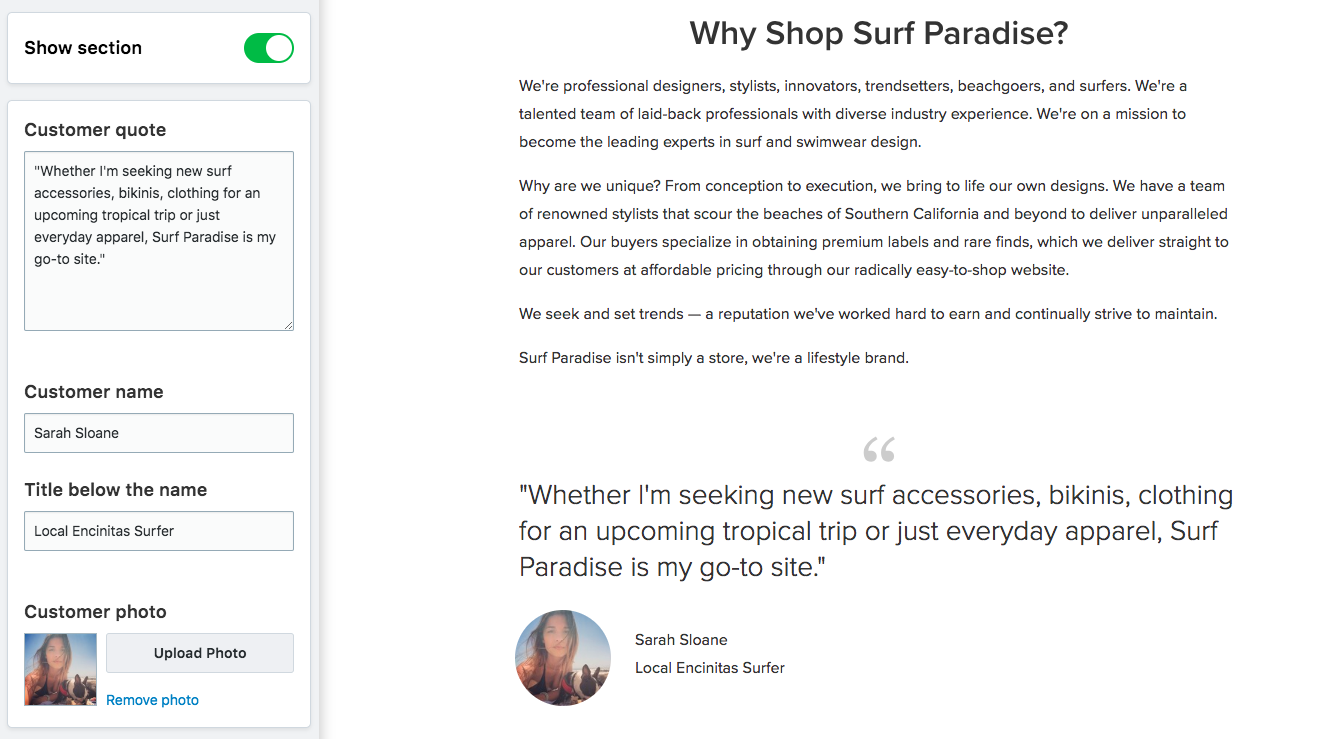
Customer testimonials
In this section you can add customer feedback on your store or products to build more trust with your audience. When potential customers see that you consistently listen to the voice of your clients, whether it’s positive or negative, they will be more willing to buy from you.
Enter the text into the Customer quote field, add the Customer name and Title below the name and upload the Customer photo.
 The image that you upload for the Customer photo will be resized to fit into the block of 96 x 96 px. The minimum required image size is 96 x 96 px (192 x192 px to render well on Retina). The supported image formats are JPEG, PNG, GIF.
You can hide the section, if you don’t need it by disabling the toggle Show section.
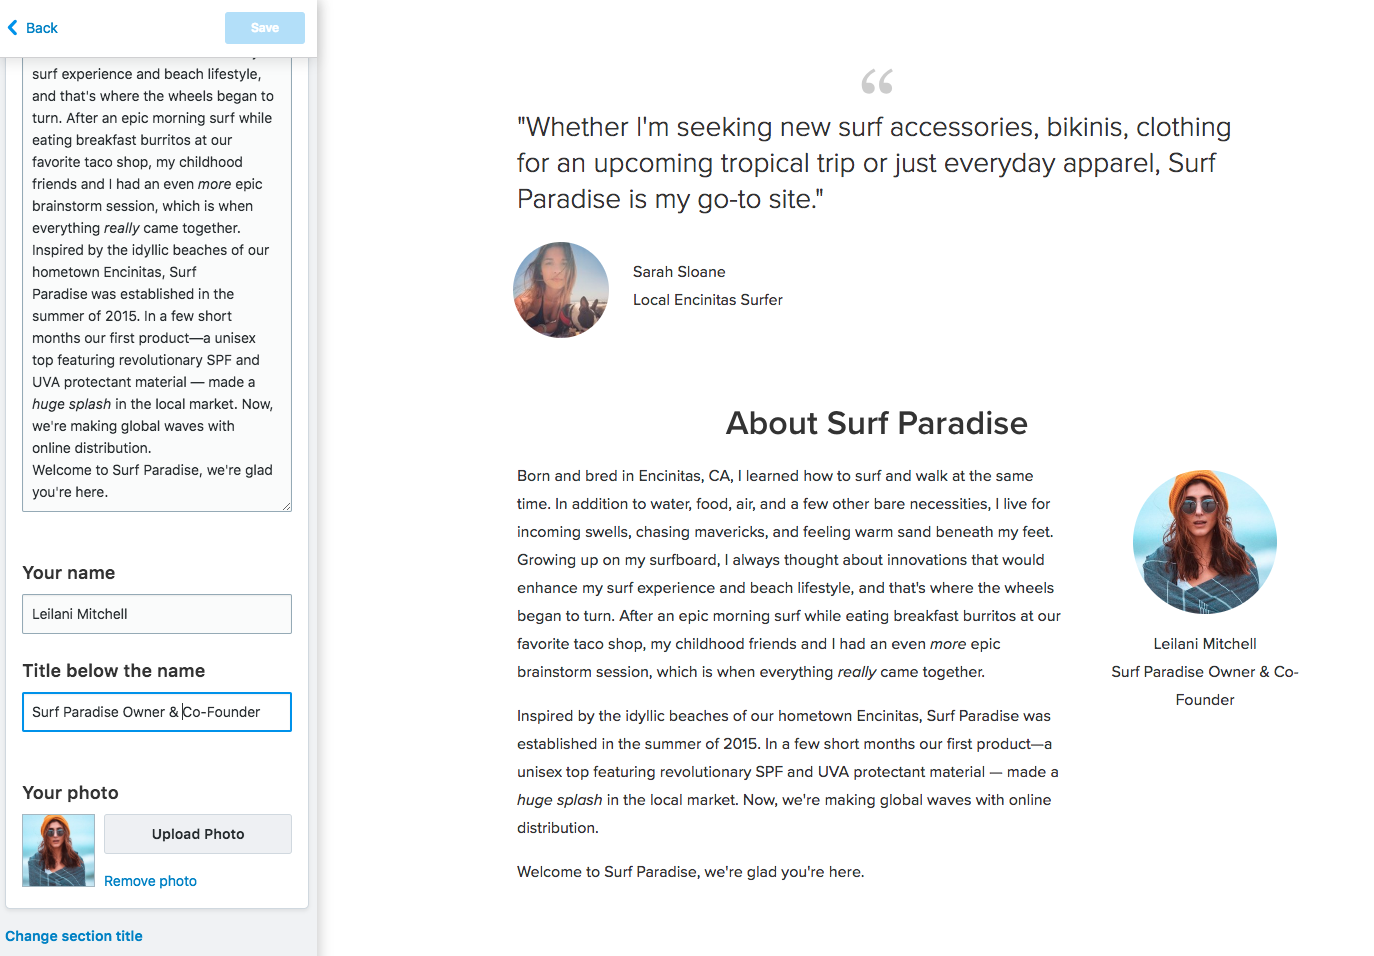
About
To establish a trustworthy connection with your customers, in this section you can describe what person or team is behind your brand, highlight the important milestones of your business and tell customers how your product or service was built to change lives.
Enter your text to the Section description field, add Your name and Title below the name and upload Your photo.
 The image that you upload for the Your photo will be resized to fit into the block of 144 x 144 px. The minimum required image size is 144 x 144 px (288 x 288 px to render well on Retina). The supported image formats are JPEG, PNG, GIF.
Hide the section by disabling the toggle Show section, if you don’t want to display it.
Location
Here you can add the location of your brick-and-mortar store and enter your business hours. This will help customers easily find your store or office and avoid situations when they arrive only to see your doors closed .
Fill out the Section description field and click Change section title to enter the name of the section.
Enter the title for the address section to the Address section subheading and type in your store’s address to the Physical address field. The location will be automatically tagged on the Google Maps. Your customers will also be able to build a route to your store from their current location on click to the Get Directions button.
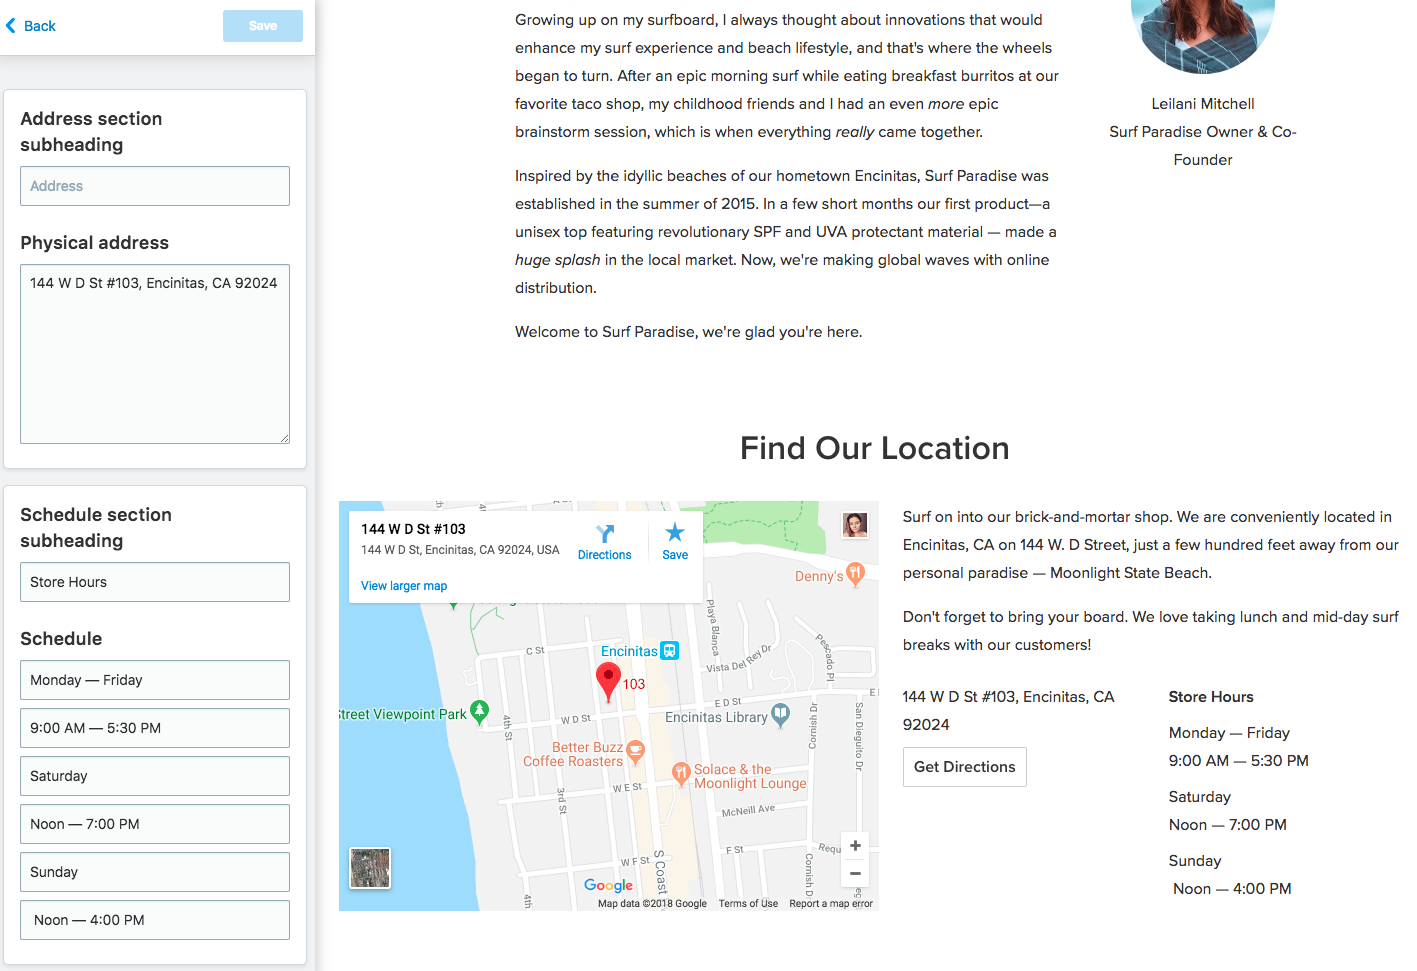
Enter the title for the business hours section to the Schedule section subheading field and use the Schedule fields to inform your clients about your working hours on weekdays and on weekends.
In case you only sell online, you can hide this section by disabling the toggle Show section.
Contact information
As the name suggests, in this section you can display your contact details and provide links to your accounts in the social media. The visitors will be able to easily share your website with their social media followers which is a great way to increase awareness about the products you sell and get your customers engaged with your brand.
Click Change section title to enter the section name and type in your Phone number, Email address and Website address to the corresponding fields.
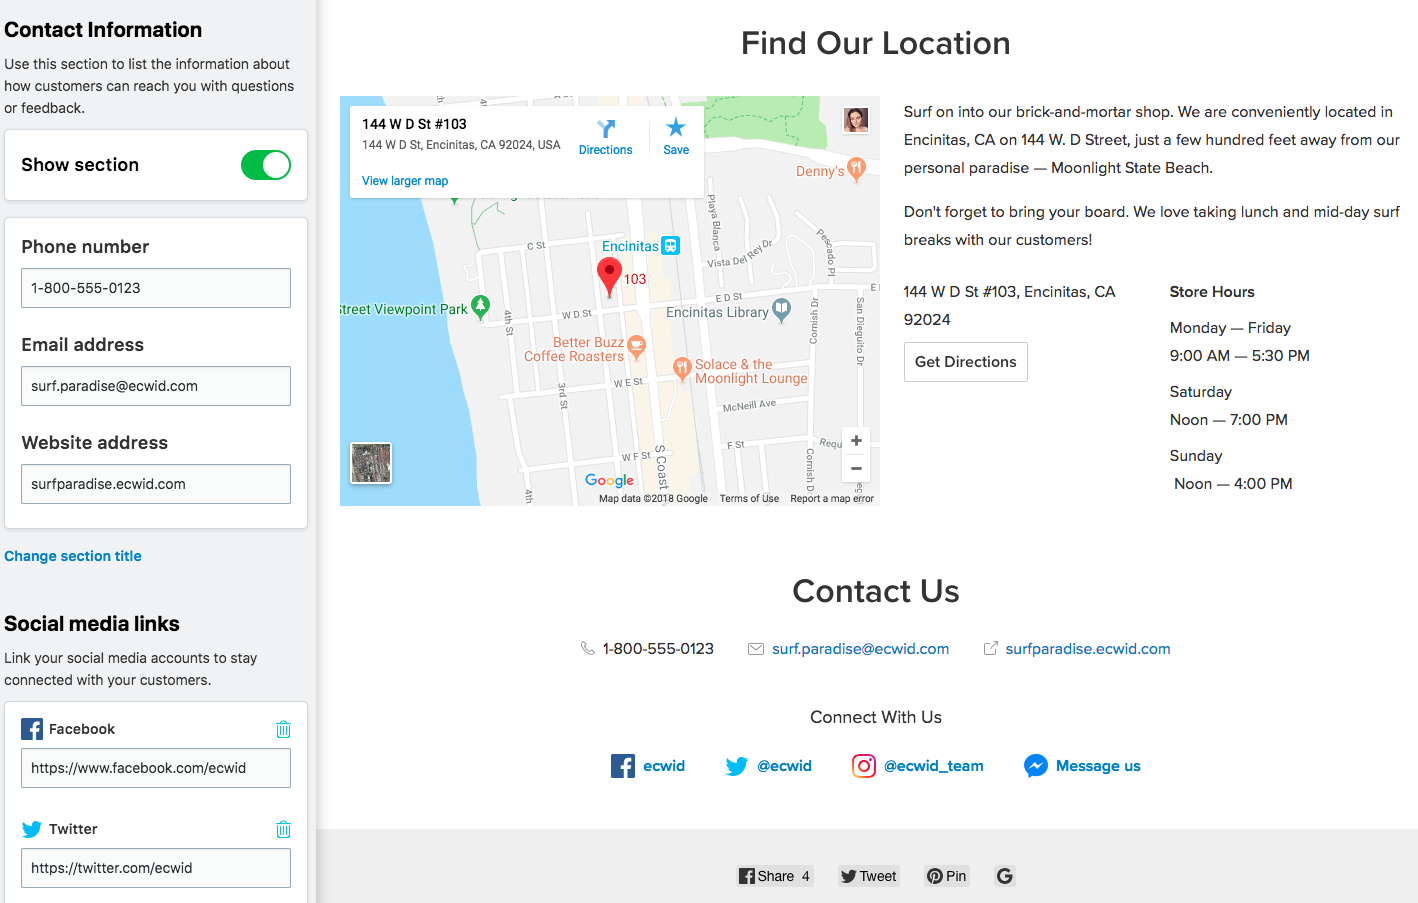
Under the Social media links block you can add links to your social media. Click Change section title to enter the name for this section. Click Add more links to open the extended list of social media resources.
Disable the toggle Show section if you would like to hide it.