Every country has its own set of requirements the online businesses must comply with. If you run your online business with your store in Ireland, you need to make sure your online store meets those of your country.
We has all the necessary features that will help you setup your store so it complies with German laws. We designed the features as separate settings that you can enable/disable at any time in your store Control Panel.
In this article:
- Enable specific features
- Set up product taxes
- VAT-exemption for small businesses
- Set up product properties
- Display product characteristics
- Set up weight / volume / length per package and price per unit
- Energy labels and product data sheet
- Right of Return expiration for digital products
- Permission to use personal data
- Consent for tracking
- Legal notices on your website
- Online dispute resolution
- Notices on checkout pages
Enable specific features
In store there is a set of features that allows you to sell in compliance with German laws. To activate these specific features you need just to set a German address as your company address in your store Control Panel → Einstellungen → Allgemein → Shopprofil.
Set up product taxes
Your products are to indicate proper tax rates. There are 2 ways you can set up taxes in your store – automatic and manual. In order to set tax rates, proceed to Einstellungen → Steuern.
Refer to this article to find the detailed instructions on how to set up taxes in store.
Note that if there is more than one tax rate in your store, you need to assign the necessary tax to each product manually. Go to Katalog → Artikel, open each product, open the Steuern und Versandkosten tab and enable the proper tax rate for this product by marking a checkbox next to it.
VAT-exemption for small businesses
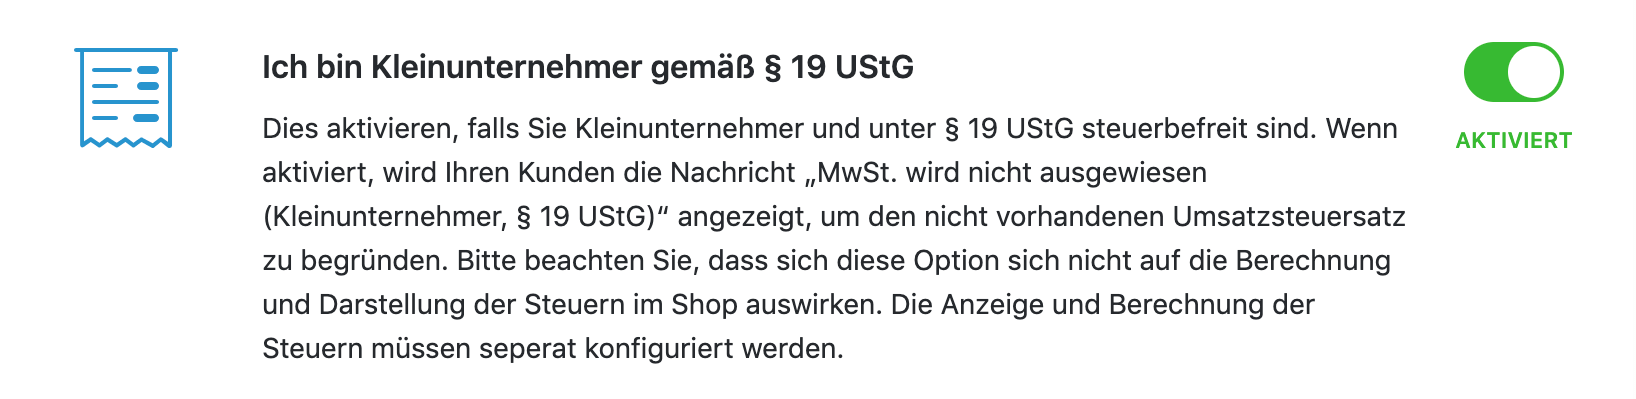
If you are a small business owner and your turnover is not big, you may not be required to collect and pay VAT. However, the law obliges small business owners to notify their customers about their special tax status. To enable such notification in your store, please proceed to Einstellungen → Steuern and enable the option Ich bin Kleinunternehmer gemäß § 19 UStG:
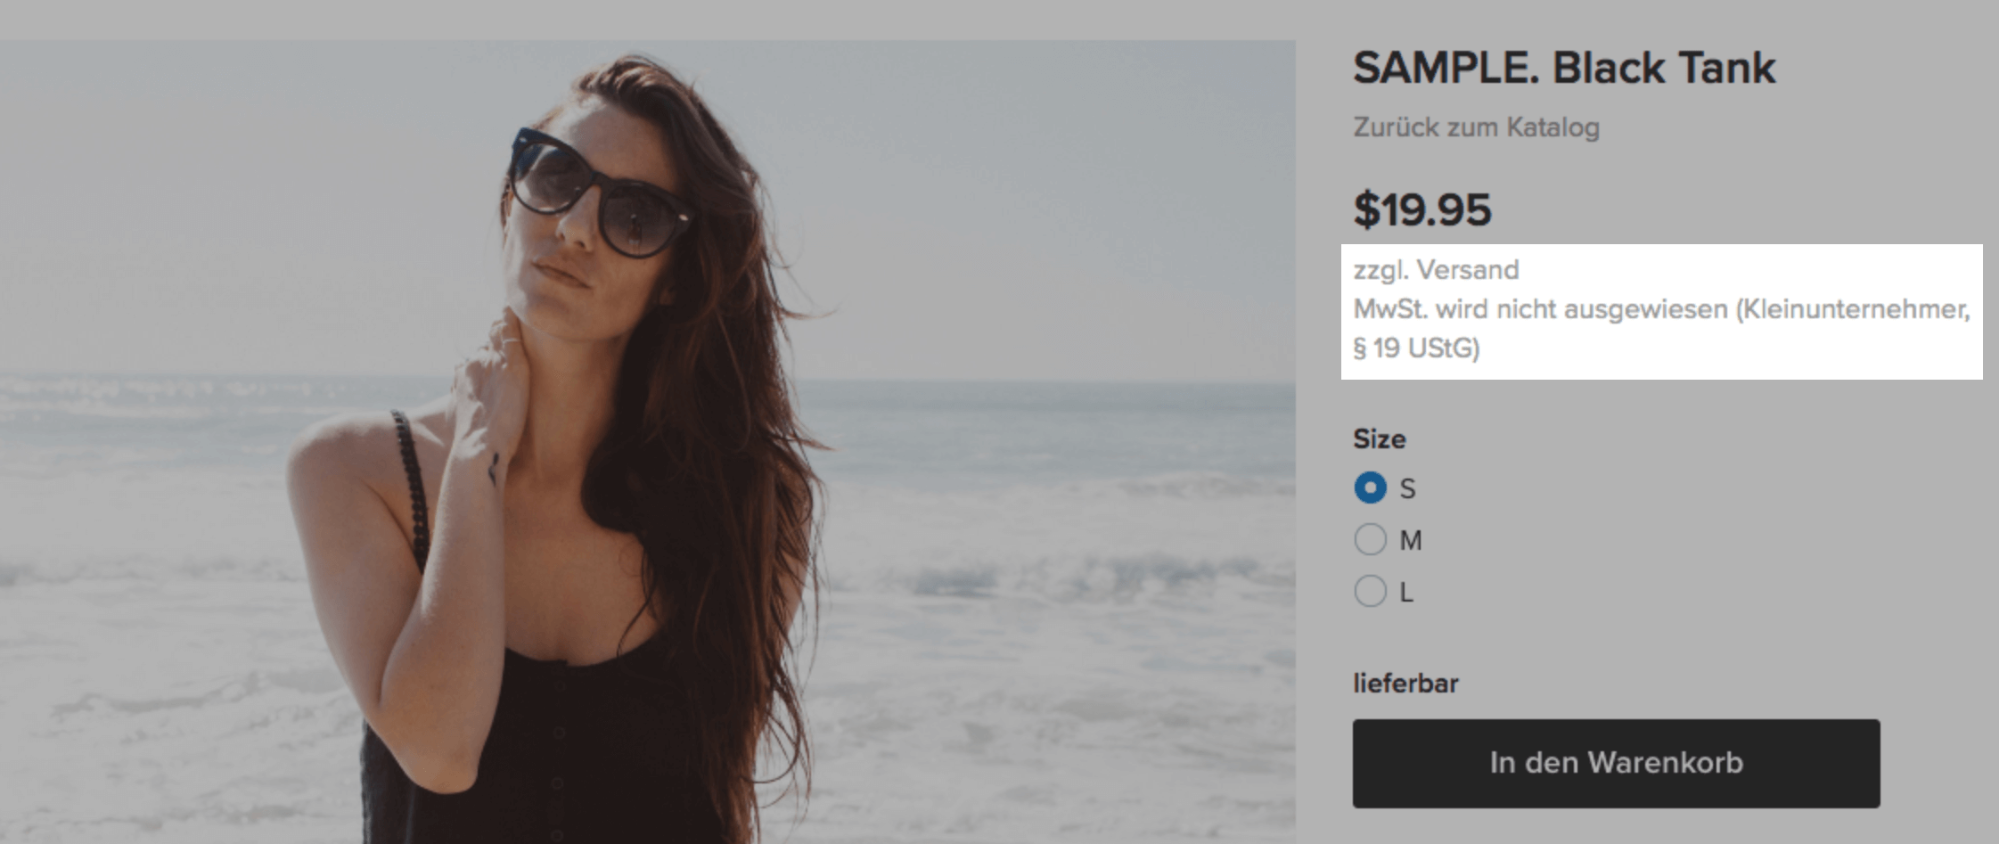
After you enable this option, the corresponding note will appear on the Product Details pages in your store:
If you no longer meet the criteria for getting the special tax status and are obliged to collect VAT, set your tax rates in Einstellungen → Steuern and disable the Ich bin Kleinunternehmer gemäß § 19 UStG option.
Set up product properties
You can set the required product properties using product attributes in store:
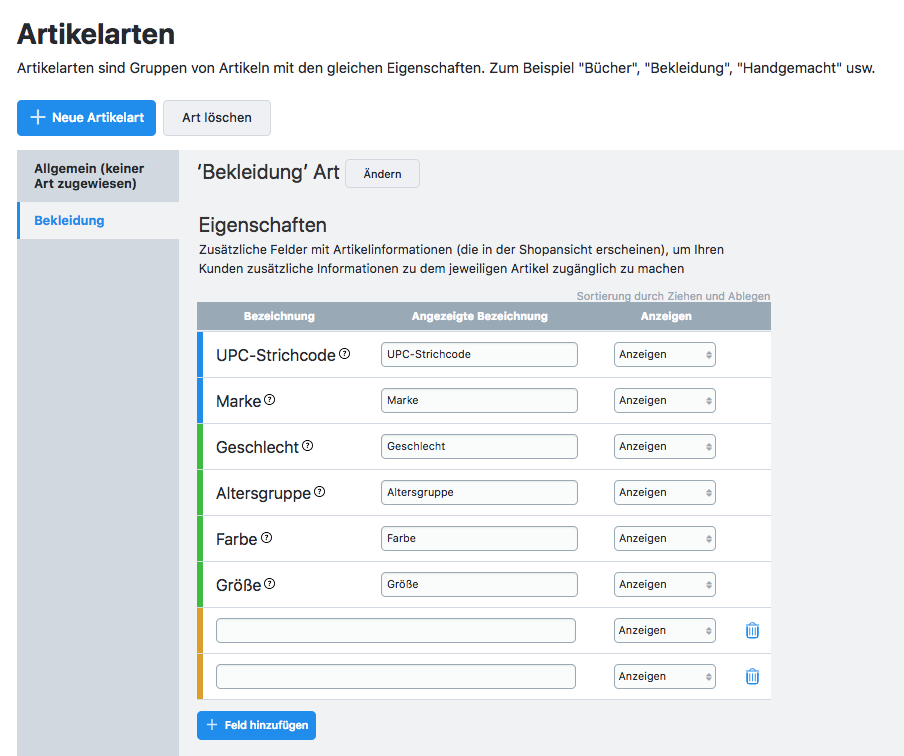
- First, you need to create a product type and attributes for it. A product type represents a set of product attributes.
- Create a new product type and assign the necessary attributes to it. You will be able to set the exact values for those later on.
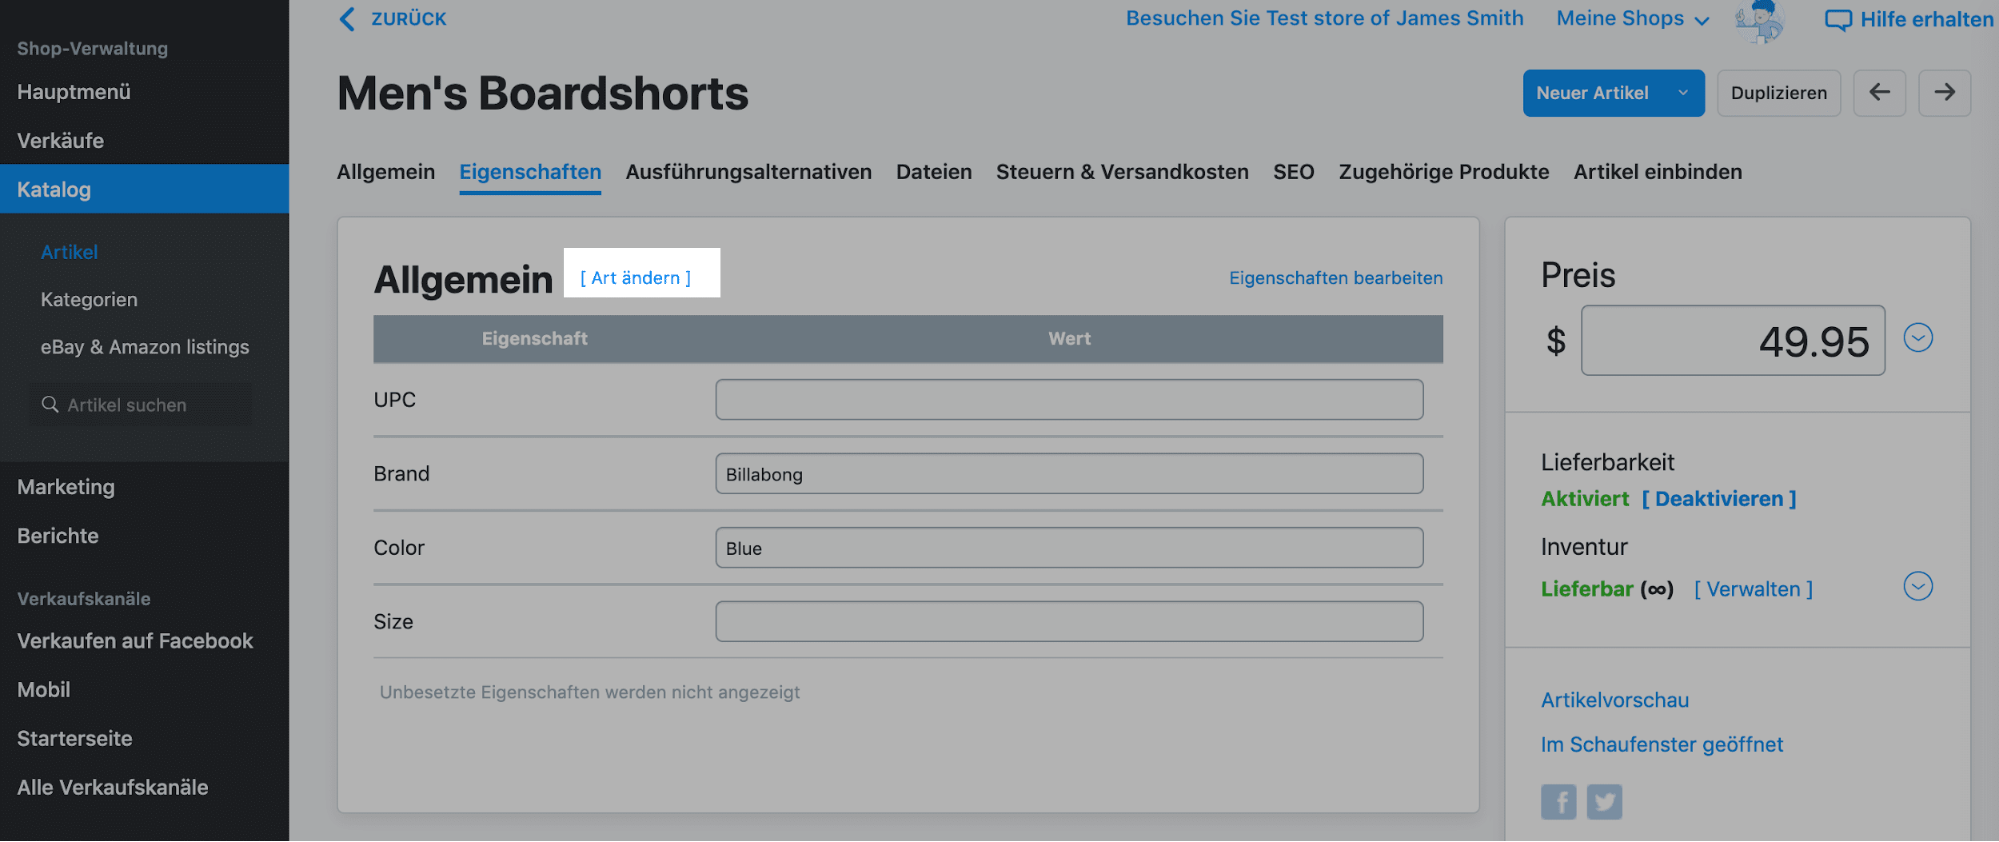
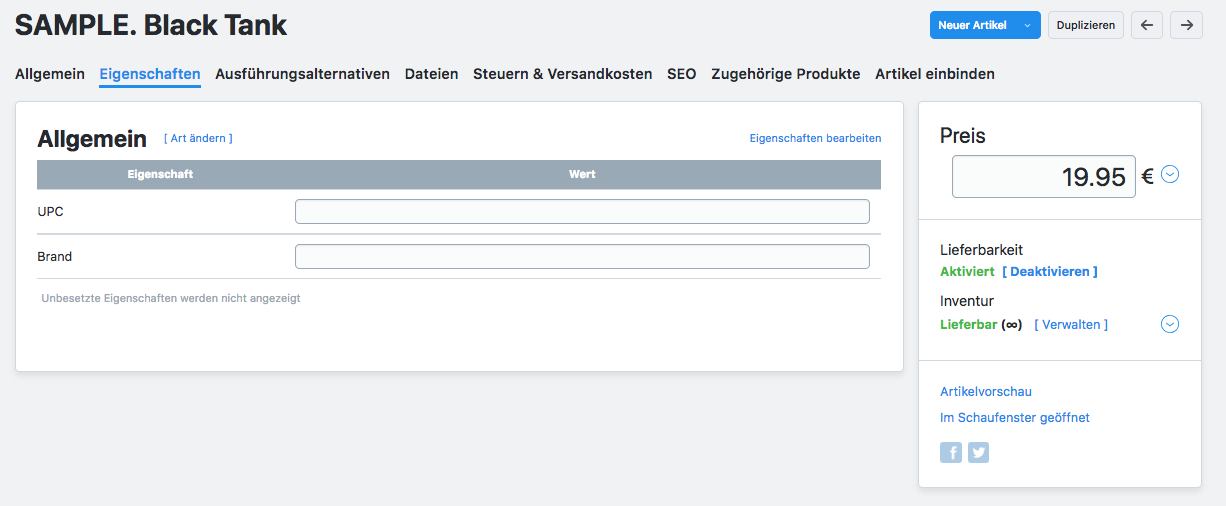
- Once the necessary attributes are created within a product type, you need to connect your products to this product type. Go to Katalog → Artikel, open each product, open the Eigenschaften tab and click the [ Art ändern ] link. Then choose the appropriate product type. After that, enter individual values for the product attributes in the displayed table.
For Lieferzeit, you might want to put an asterisk into the attribute value to add a footnote regarding the shipping costs.
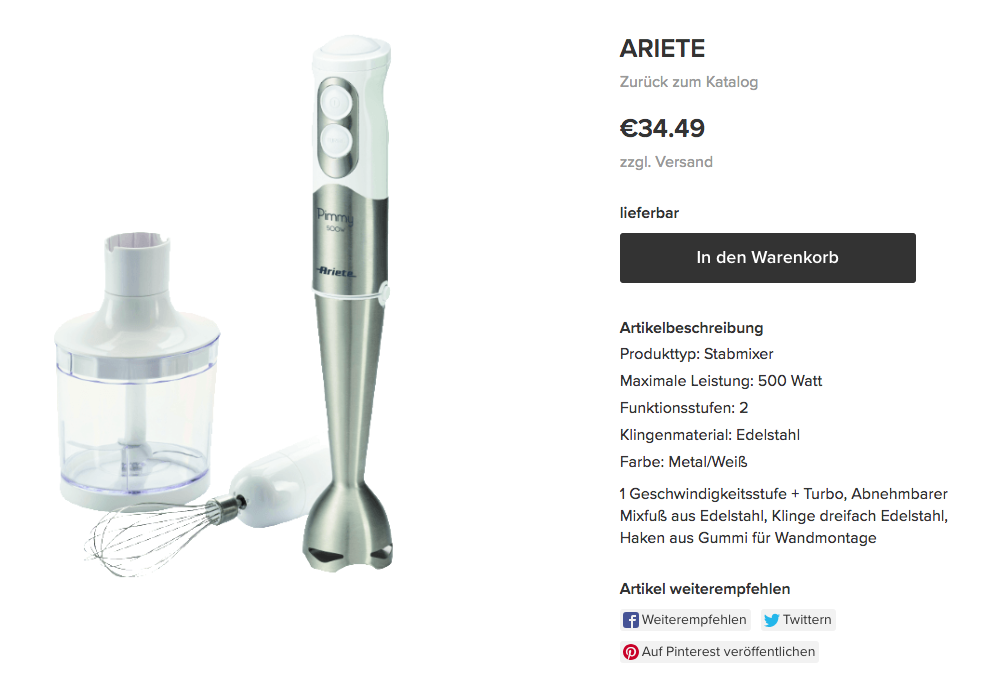
Display product characteristics
If you add essential product characteristics as product attributes, they appear in the product page in your store. It makes it easier for your customers to decide what product to purchase.
Once you add the product attributes values, they show in the Product page, the Cart page, and the Order Confirmation page.
Set up weight / volume / length per package and price per unit
If a product can be measured in units such as kilograms, liters, meters, you need to specify the exact price for that unit of measurement in your store. Navigate to Einstellungen → Allgemein → Warenkorb page and enable the Einzelpreis anzeigen option. After that:
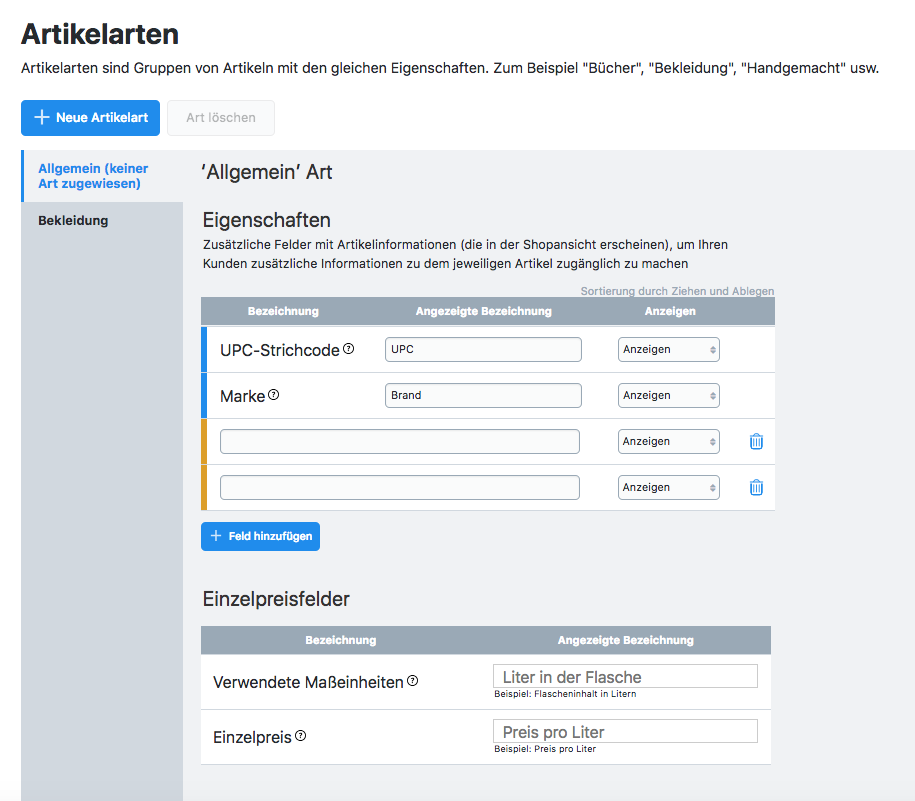
- Set the displayed names for these parameters as a part of the product type in Einstellungen → Artikelsorten as described in the previous section. Each product type allows to set its own displayed names for these parameters. So you should have one product type for liquid products (beer, juice etc) measured in liters and a different product type for products measured in 100 grams units (cheese, nuts):
- Once these properties are set as product types, you can connect those properties to a product: go to Katalog → Artikel, open each product, open the Eigenschaften tab and click the [ Art ändern ] link to choose the appropriate product type:
- Then set the values for those parameters: click the dropdown button next to the product price in the price editor and enter the necessary values to the corresponding fields:
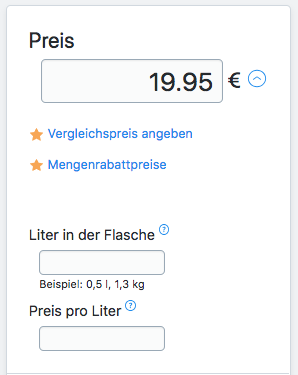
- Please make sure that the price per unit also includes all applicable taxes.
Energy labels and product data sheet
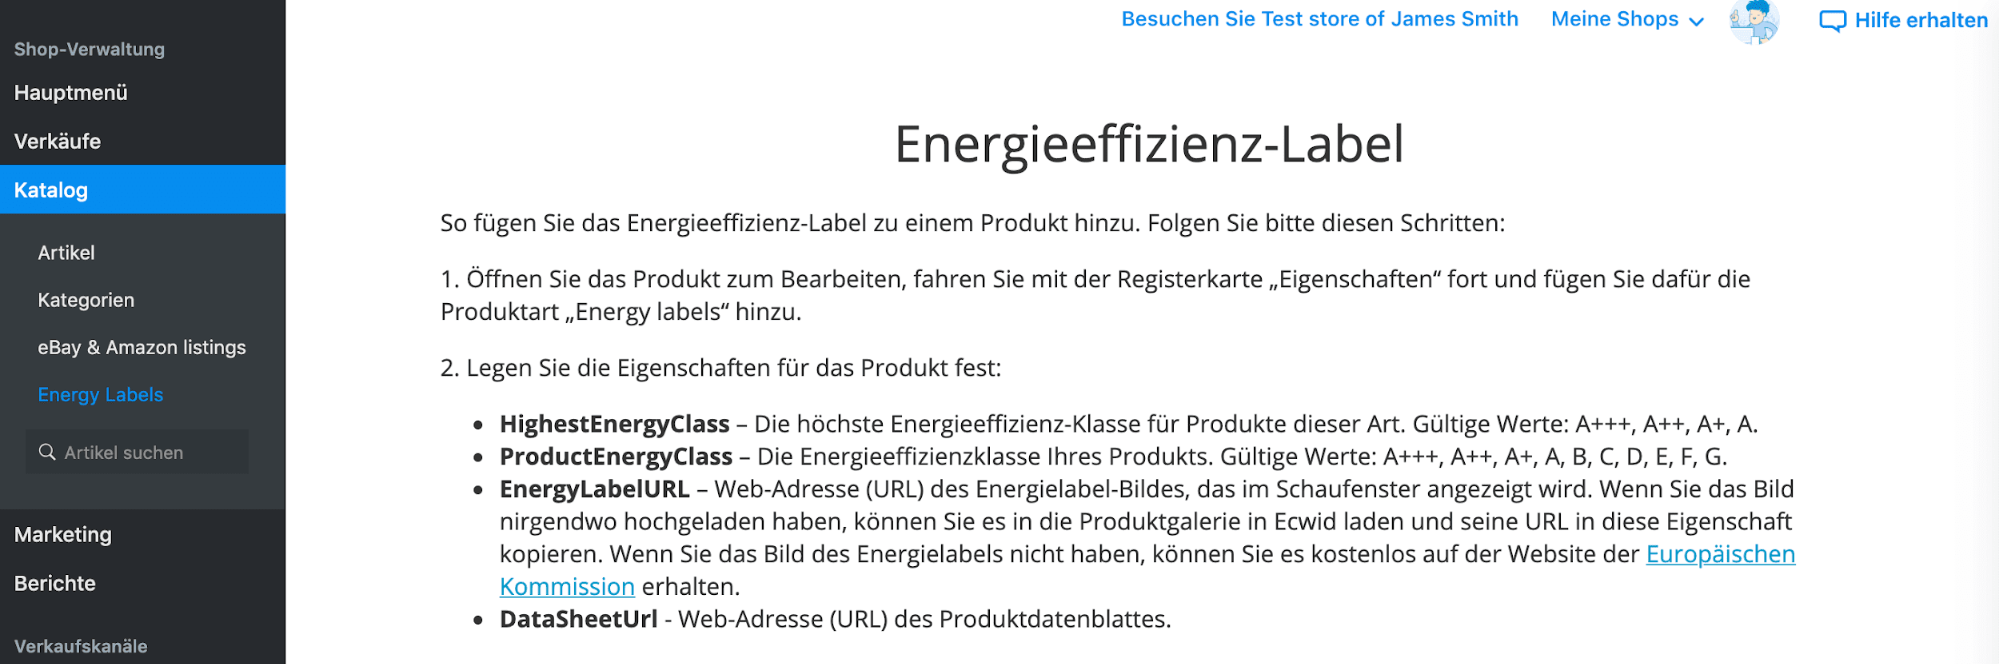
If you sell energy-consuming products in your store (household electrical appliances, electric lamps, etc), you are obliged to show the energy labels and the data sheet for such products. In store you can do this with the help of the Energy labels application. This app allows you to comply with the law requirements and provide your customers with the necessary information about your energy-consuming products.
Once the app is installed, you will see a detailed instruction on how to add energy labels and product data sheet in your store Control Panel → Katalog → Energy Labels:
Right of Return expiration for digital products
If you sell digital products, your customers are eligible to return purchases within 14 days for a full refund unless they have started downloading or streaming digital goods. If you would like to avoid refund requests for the digital products purchased in your store, you may ask your customers for a consent to the expiration of the right of return when a digital item is purchased.
To enable this option in your store, go to Einstellungen → Allgemein → Rechtliche Hinweise and activate the Kontrollkästchen zum Einholen der Einwilligung zum vorzeitigen Erlöschen des Widerrufsrechts bei digitalen Produkten option:
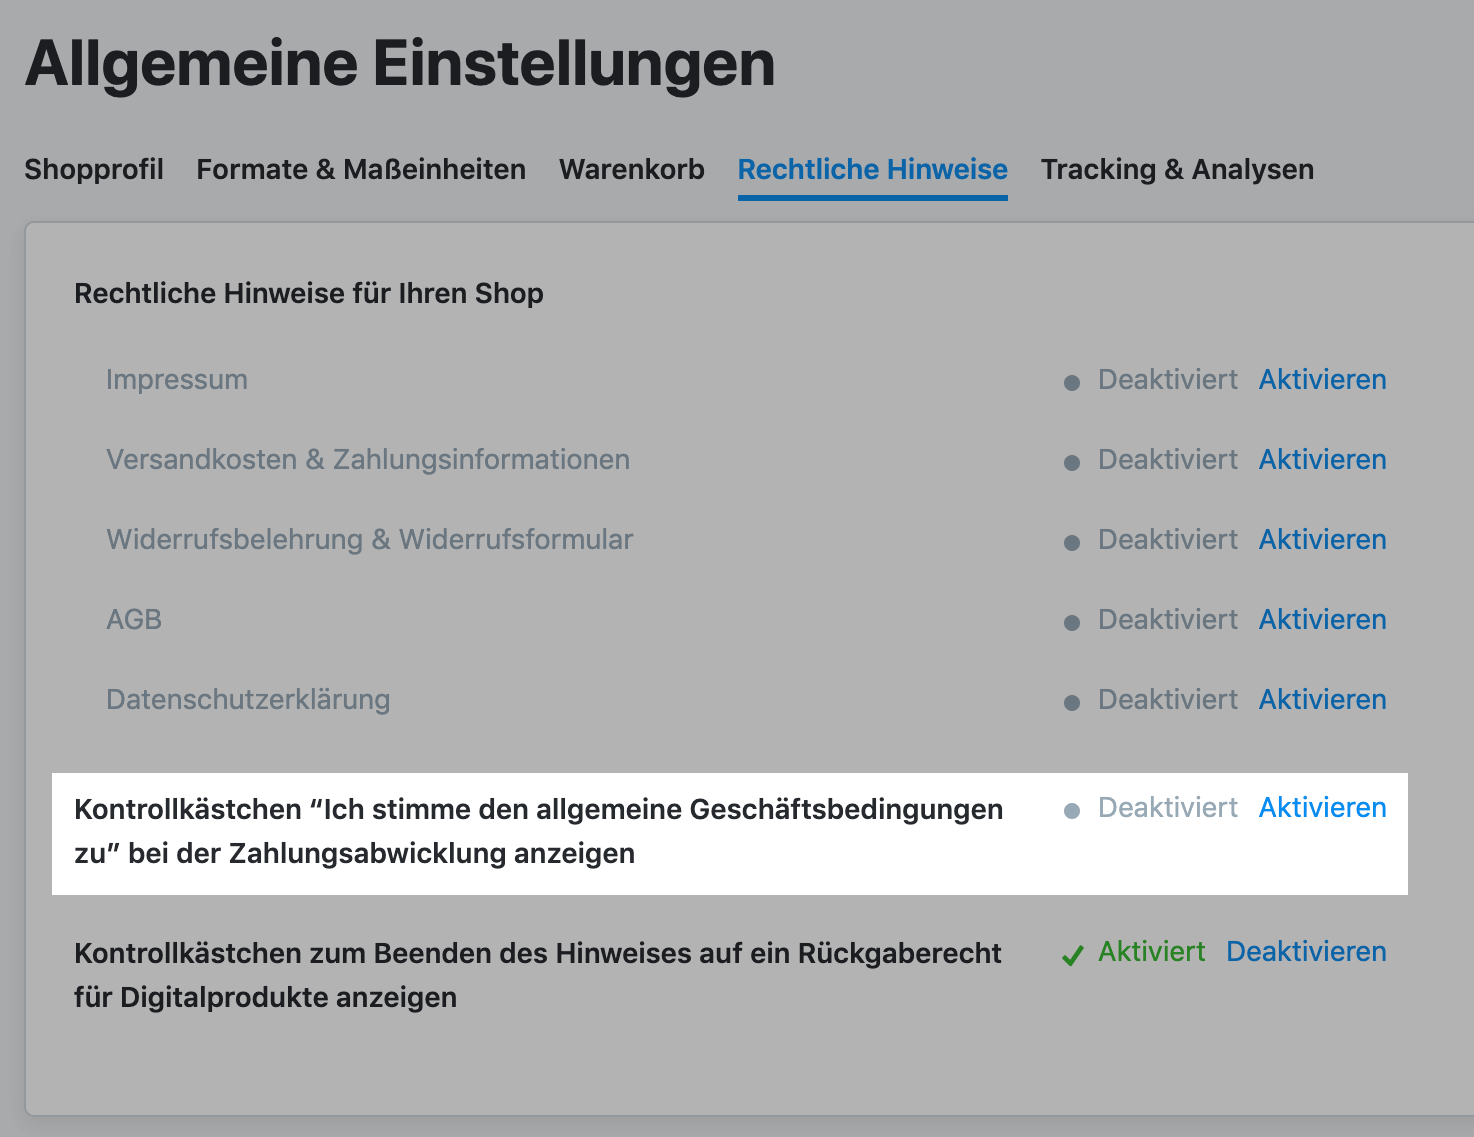
When the option is enabled, the corresponding mandatory checkbox will be shown on the Cart page in your store.
Permission to use personal data
You may need to use your customers’ email addresses for different store purposes: send reminders about abandoned carts or pass email addresses over to a shipping carrier company. The customer's email address is considered a personal data, which means you must receive explicit permission from customers to use their emails. To request such permission from your store customers, use a special checkbox in the store checkout page.
To enable and set the checkbox, go to Einstellungen → Allgemein → Warenkorb, Newsletter and activate the Holen Sie die Zustimmung Ihrer Kunden zum Erhalt Ihrer Marketing-E-Mails an der Kasse ein option:
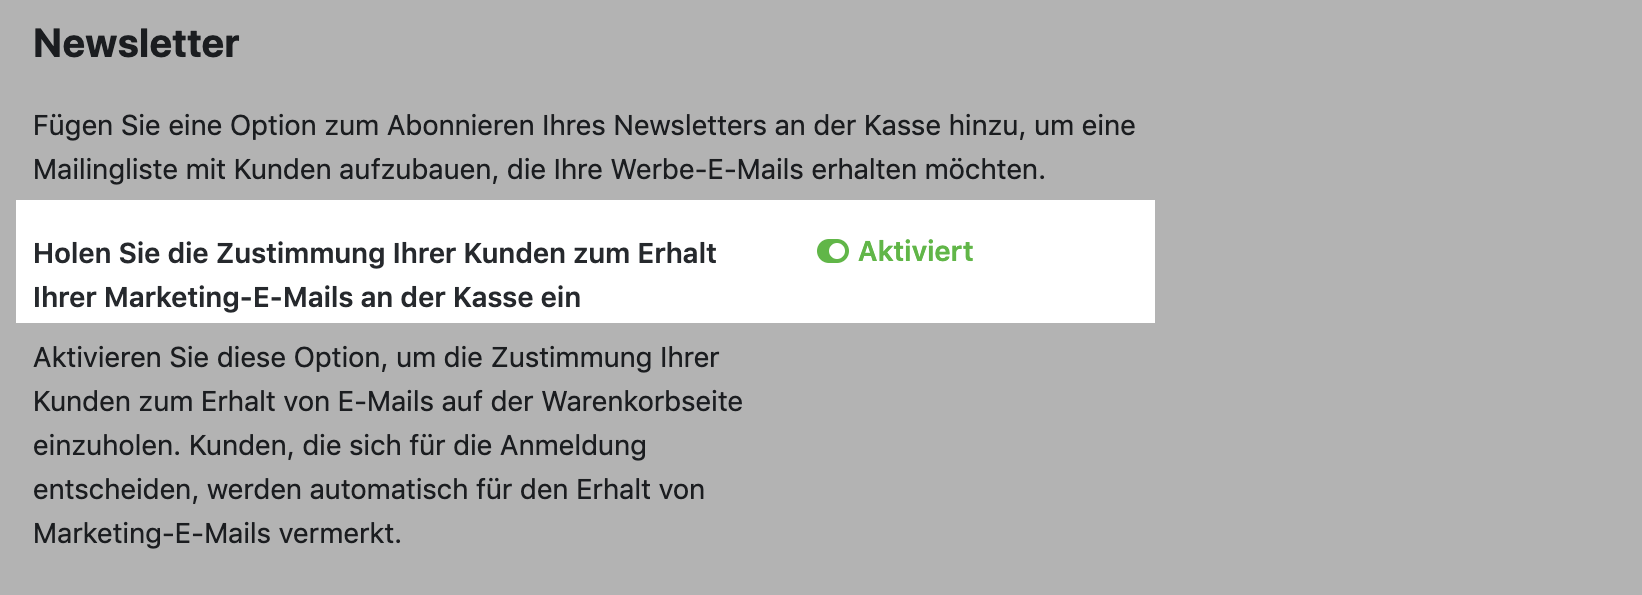
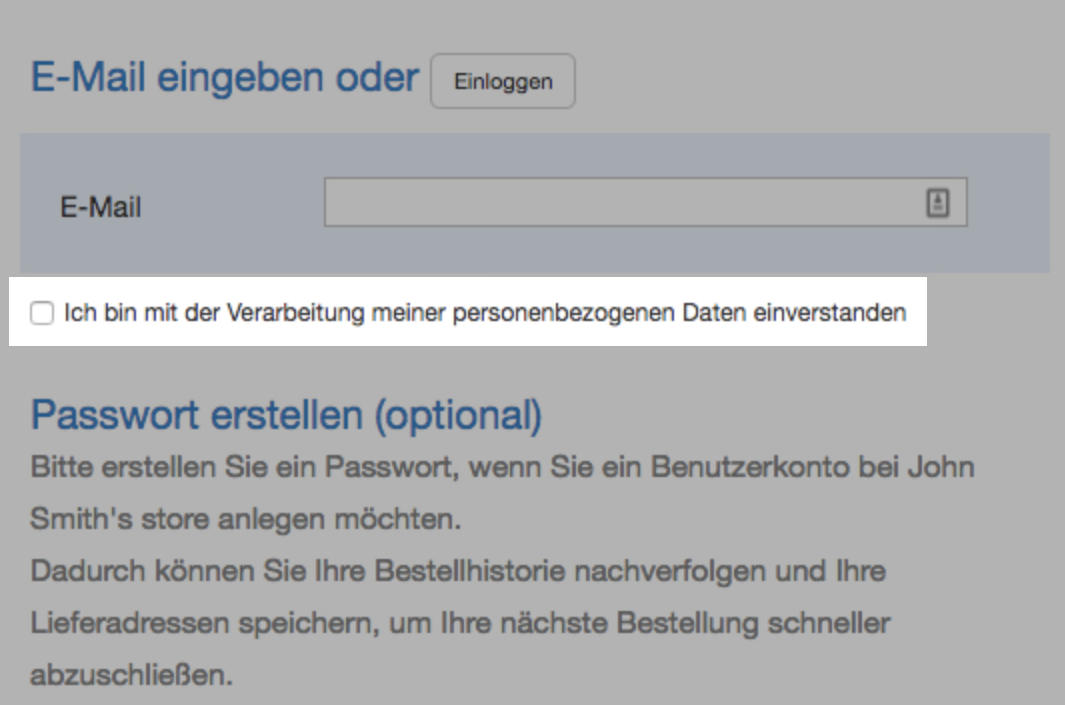
Once you have activated the option, the corresponding checkbox is displayed at checkout, under the e-mail address input field:
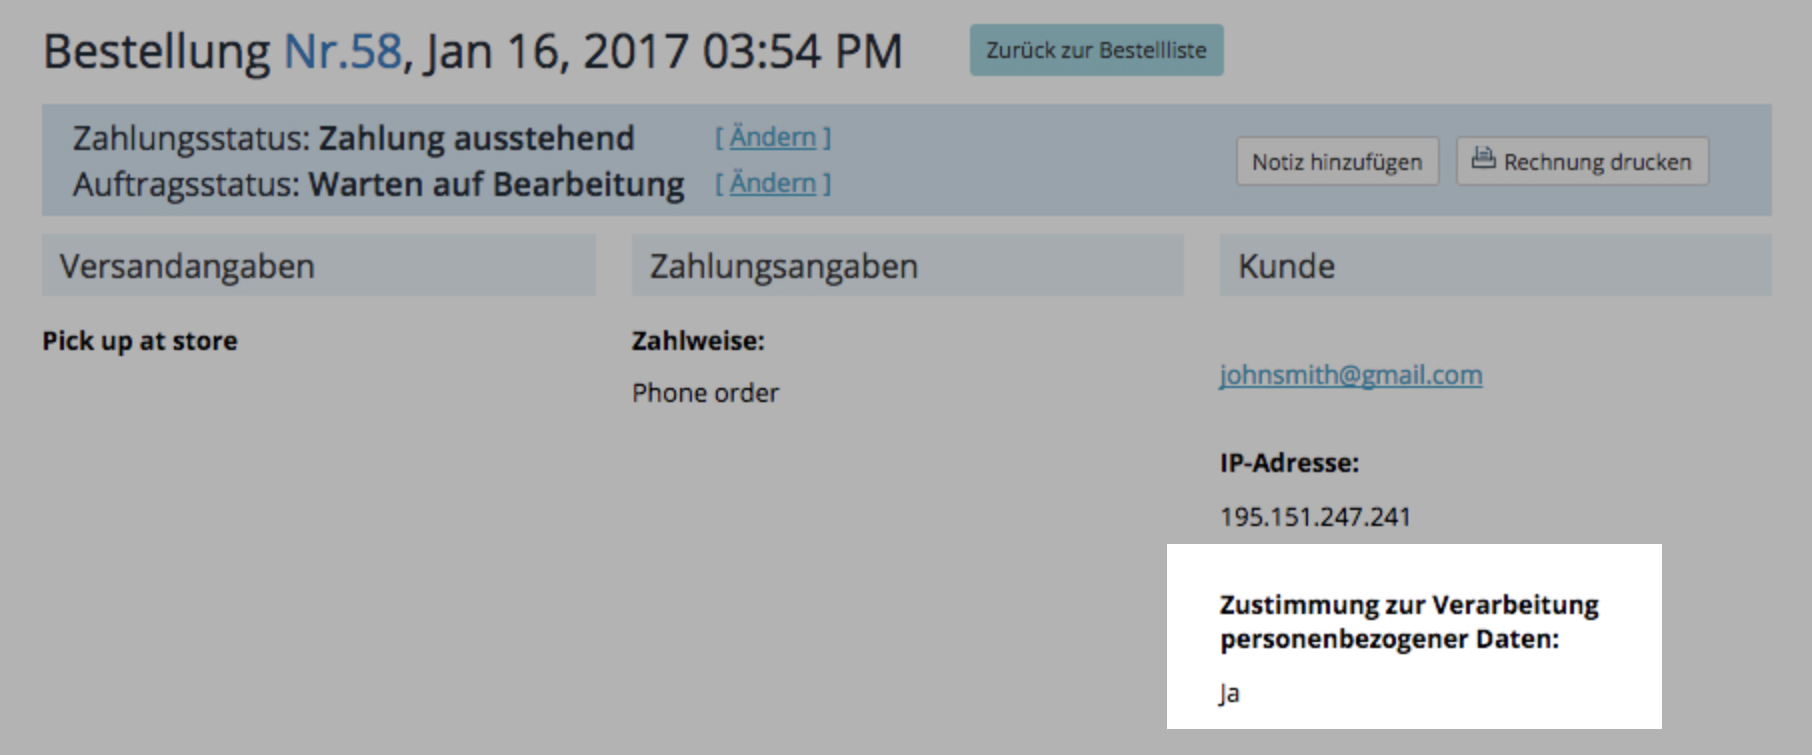
After a customer grants permission to use their email, this information appears in the order details:
Consent for Tracking
You can display a banner on your storefront asking for a customer’s consent for tracking. The banner appears once a customer starts browsing the website, and doesn’t disappear until they make a selection. The customer data is only tracked if they click Accept. You can enable the banner under Einstellungen → Allgemein, the GDPR cookie consent banner block.
We recommend checking the default text on the banner and updating it to your needs. For example, you can use the following text:
Our website may use Facebook Pixel and cookies for statistical purposes and to track how our marketing activities on Facebook are recorded and improved. Similarly, we may use Google Analytics to monitor the activity on our website. Information on Facebook Pixel, Google Analytics, cookies, and your right to object can be found in our Privacy Policy.
To update the banner’s text use the Storefront Label Editor application and set a necessary content for the Notice.TrackingConsent.description label.
Legal notices on your website
It is required to display the legal information concerning delivery, privacy policy, terms of service, etc in your store. Please, contact your legal advisor to get the required legal documents.
To view an example of terms and conditions in German, check out the German Terms and Conditions templates article.
More details on Legal pages in your store
Adding legal pages at cm4all sitebuilder
- Enter your website editor.
- Click the footer area of the site to start editing the text.
- Enter the anchor of the links to the necessary legal pages.
- Select the added text, so the editor toolbar appears.
- Choose the right font and formatting for these links.
- Select the anchor text for each link.
- In the editor toolbar click the link icon and set the URL of the link to that particular page (you can find out those URLs as detailed above).
For a footnote for Lieferzeit attribute, you can either add the text to the footer to display it on every page or put it below the store widget to display it only on the store page. Click the area where you’d like to put the footnote and add the following text:
* Gilt für Lieferungen innerhalb Deutschland. Lieferzeiten für andere Länder finden Sie hier
Select the hier word, click the link icon in the editor toolbar and add the link to your Versandkosten page in store(you can find the URL for this page as described above).
If you offer express shipping methods, your Lieferzeit attribute might say:
Standard max. 5 Tage, Express 1 Tag*
In this case, the footnote should be:
*Gilt für Lieferungen nach Deutschland bei Standardversand. Bei Expressversand gilt eine Lieferzeit von 1 Tag innerhalb Deutschlands. Lieferzeiten für andere Länder und Informationen zur Berechnung des Liefertermins siehe hier
Again, select the hier word, then click the link icon in the editor toolbar and add the link to your Versandkosten page in store.
Adding links to legal pages in Wordpress
- Log in to your WP Admin area. In the menu choose Appearance → Menus. Create a new menu for your legal pages. Find the URLs for the links to each legal page in your store. Use the Links area to add each link into the menu.
- Once the menu is ready, save it and go to Appearance → Widgets. From the selection of widgets, drag the Custom menu widget into the footer widget area or sidebar area, depending on where you’d like to show these links. In the Menu dropdown of this new widget select the menu you just created.
- For the Lieferzeit footnote, in the Appearance → Widgets drag the Text widget into the footnote area. Add the text of your footnote:
* Gilt für Lieferungen innerhalb Deutschland. Lieferzeiten für andere Länder finden Sie <a href="LINK">hier</a>
Replace the LINK in this text with the URL of your Versandkosten page in store(you can find the URL for this page as described above).
If you offer express shipping methods, your Lieferzeit attribute might say:
Standard max. 5 Tage, Express 1 Tag*
And then the footnote text should be:
*Gilt für Lieferungen nach Deutschland bei Standardversand. Bei Expressversand gilt eine Lieferzeit von 1 Tag innerhalb Deutschlands. Lieferzeiten für andere Länder und Informationen zur Berechnung des Liefertermins siehe <a href="LINK">hier</a>
Again, replace the LINK in this text with the URL of your Versandkosten page in store(you can find out the URL for this page as described above).
Online dispute resolution
According to one of the European directives, every European trader should provide a link to the platform for online dispute resolution (so-called "OS-platform") where the trader and a customer could try to resolve their disputes about online purchases out-of-court.
To meet this requirement, just add a short description and a link to the OS-platform in the About us page (Einstellungen → Allgemein → Rechtliche Hinweise).
Here are the examples:
- In English:
Platform of the EU Commission regarding online dispute resolution: http://ec.europa.eu/consumers/odr - In German:
Plattform der EU-Kommission zur Online-Streitbeilegung: http://ec.europa.eu/consumers/odr
Notices on checkout pages
Sometimes you may want to show your customers an important note at checkout.
For example, if the customers are outside of the European Union, some extra charges like custom duties may appear. Adding such notes to your store is possible with the help of a special application which allows displaying any text at the top of the following checkout pages:
- Cart page
- Shipping Details page
- Payment Details page
- Place Order page
- Order Confirmation page
It is the Checkout notices app from App Market. After you have installed the app, open it and click Enable near the name of the page you'd like to add a note to, then enter your text to the field that appears.
If the note contains the information about extra charges (e.g. customs duty), we also recommend adding this information to the Order confirmation email. You can change the notification template in your store Control Panel → Einstellungen → E-Mail.