- Knowledge Centre
- Guest Articles
FCR Scheduler
Step by Step guide for scheduler settings
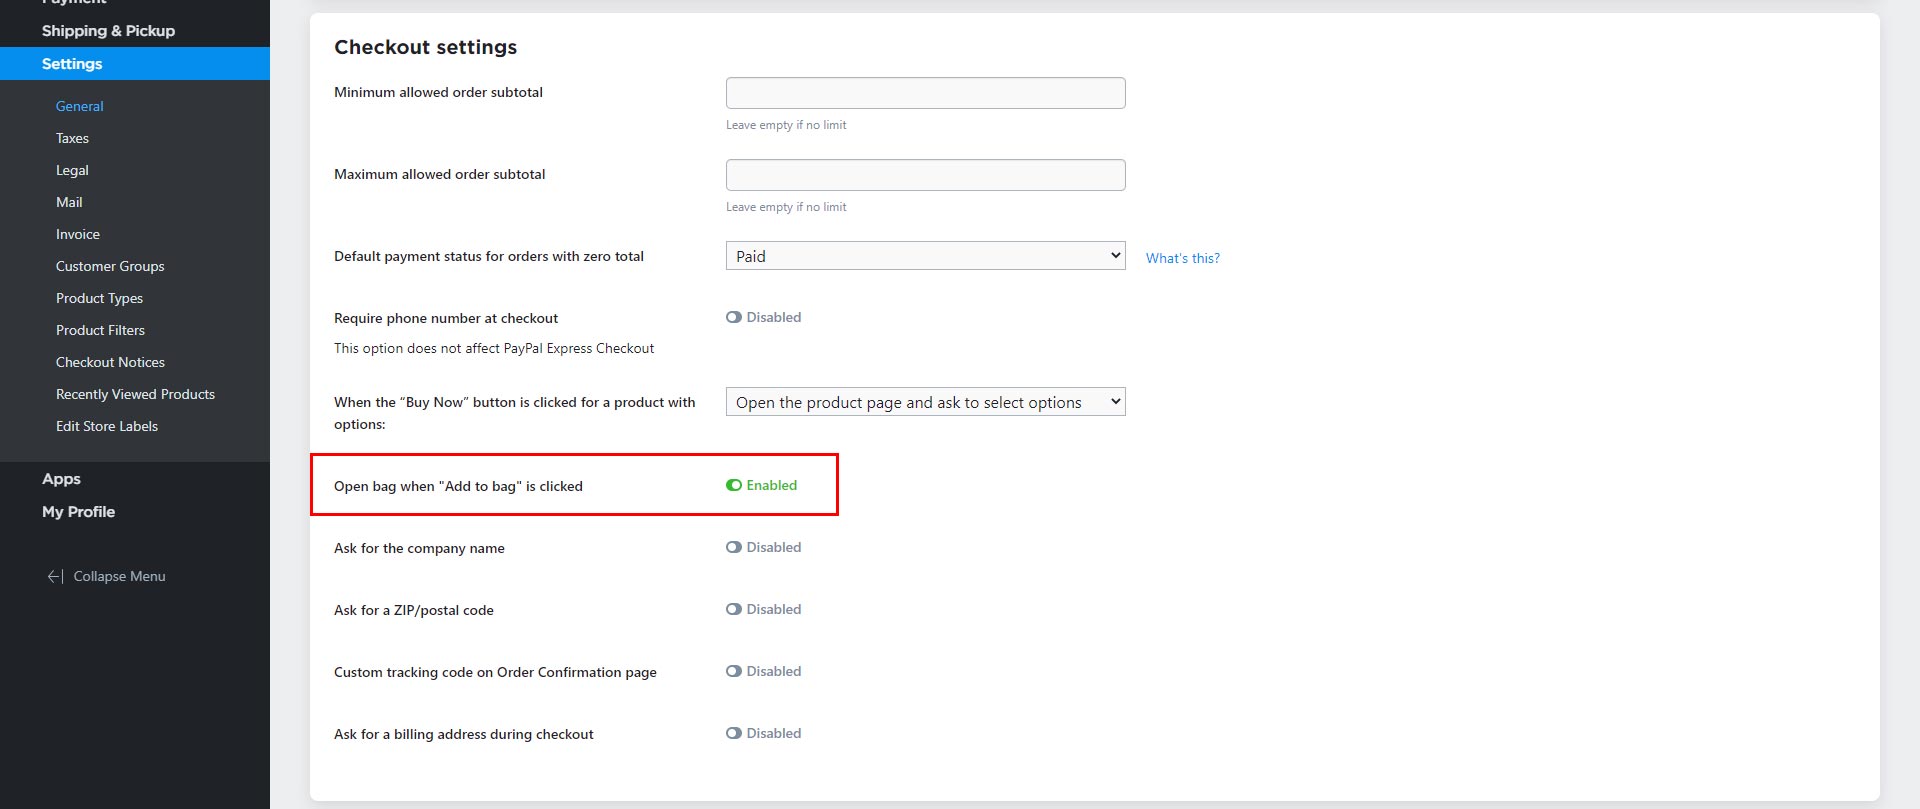
Go to settings -> General and enable “Open bag when “Add to bag” is clicked”
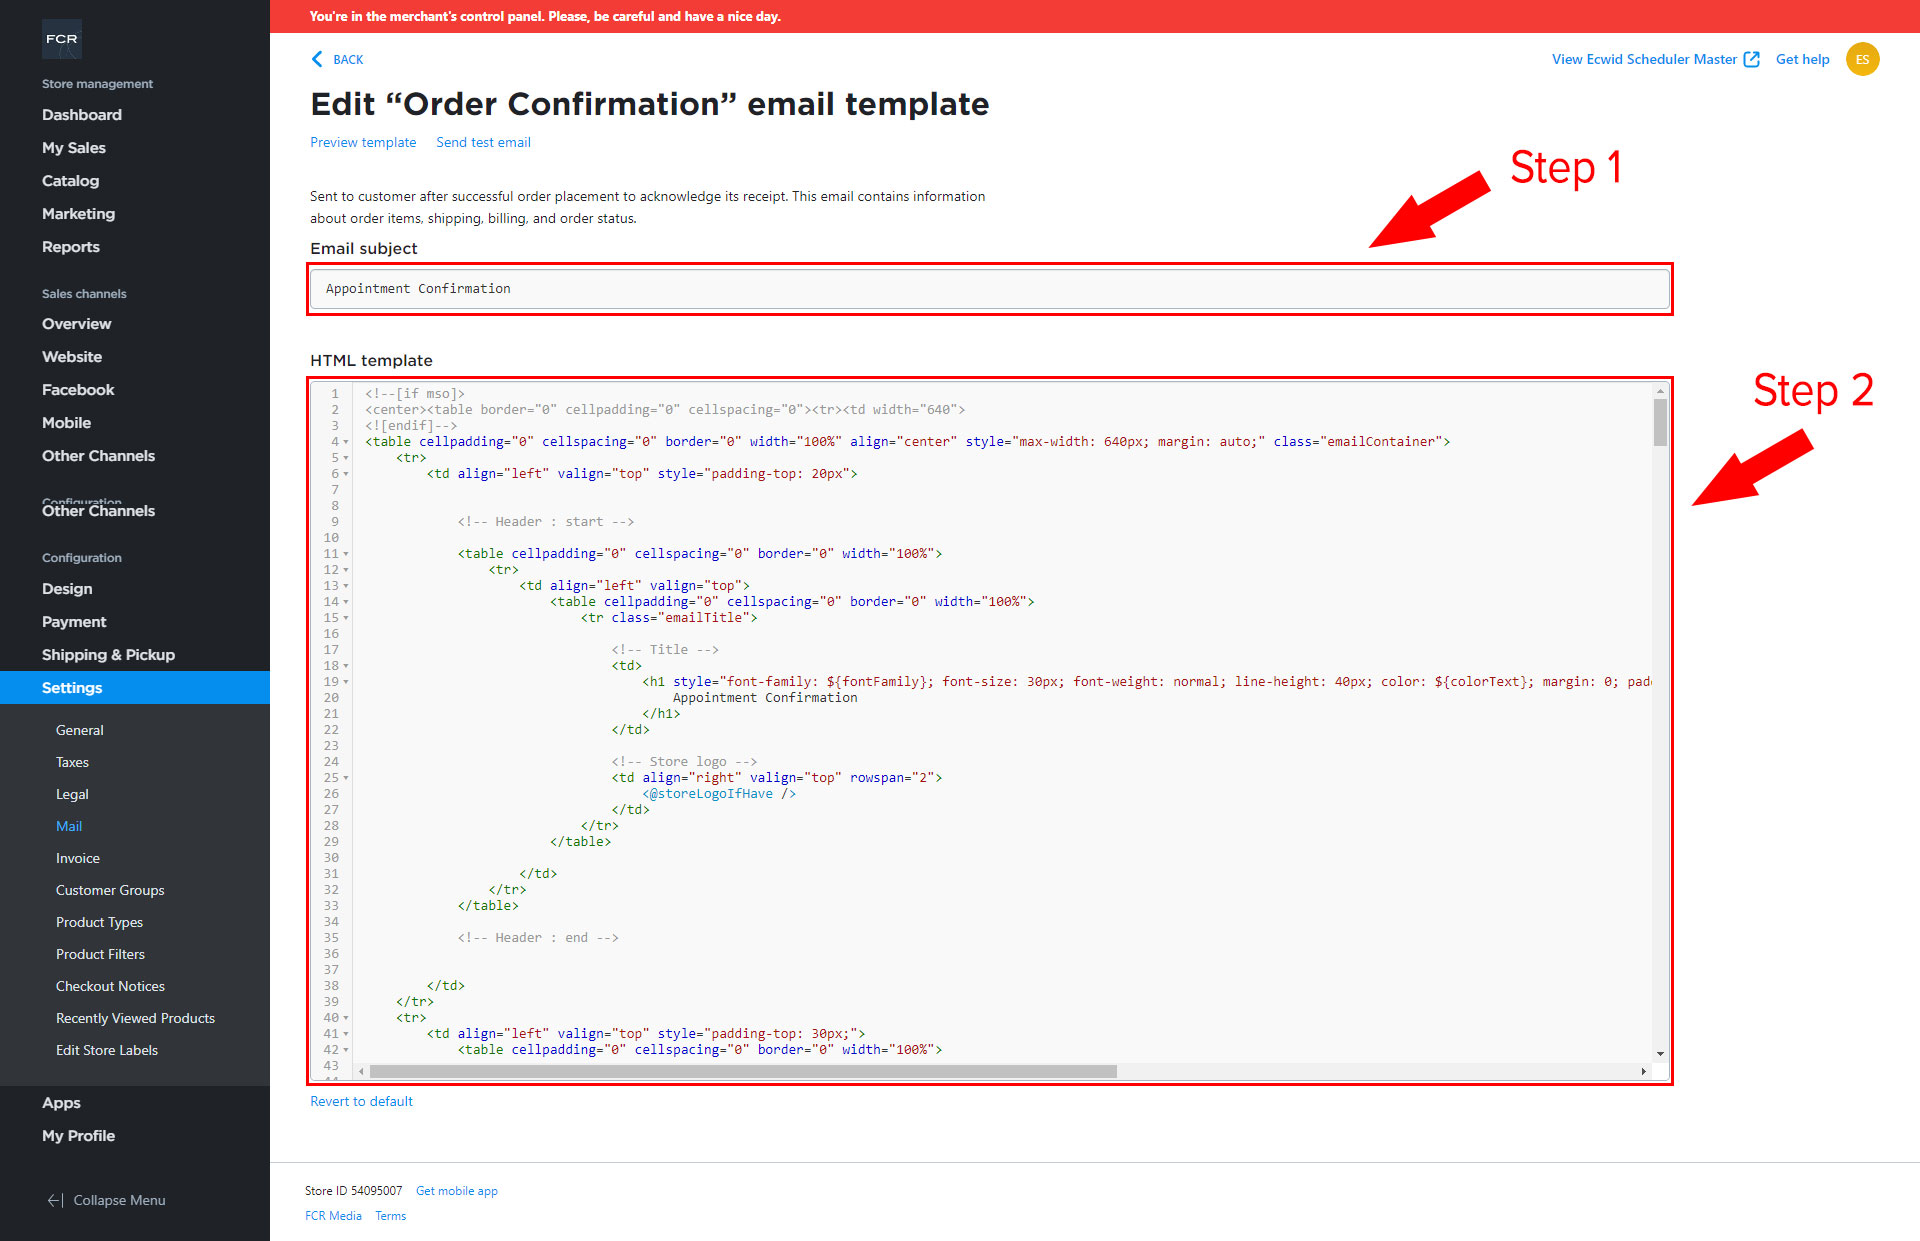
Go to settings -> Mail and edit the Order Confirmation customer notification

Change Email subject to “Appointment Confirmation” & replace the HTML template code with the code here: https://drive.google.com/file/d/1woUhVAKeipYfHz5rYeSJPgiFmRaUqvR5/view?usp=sharing
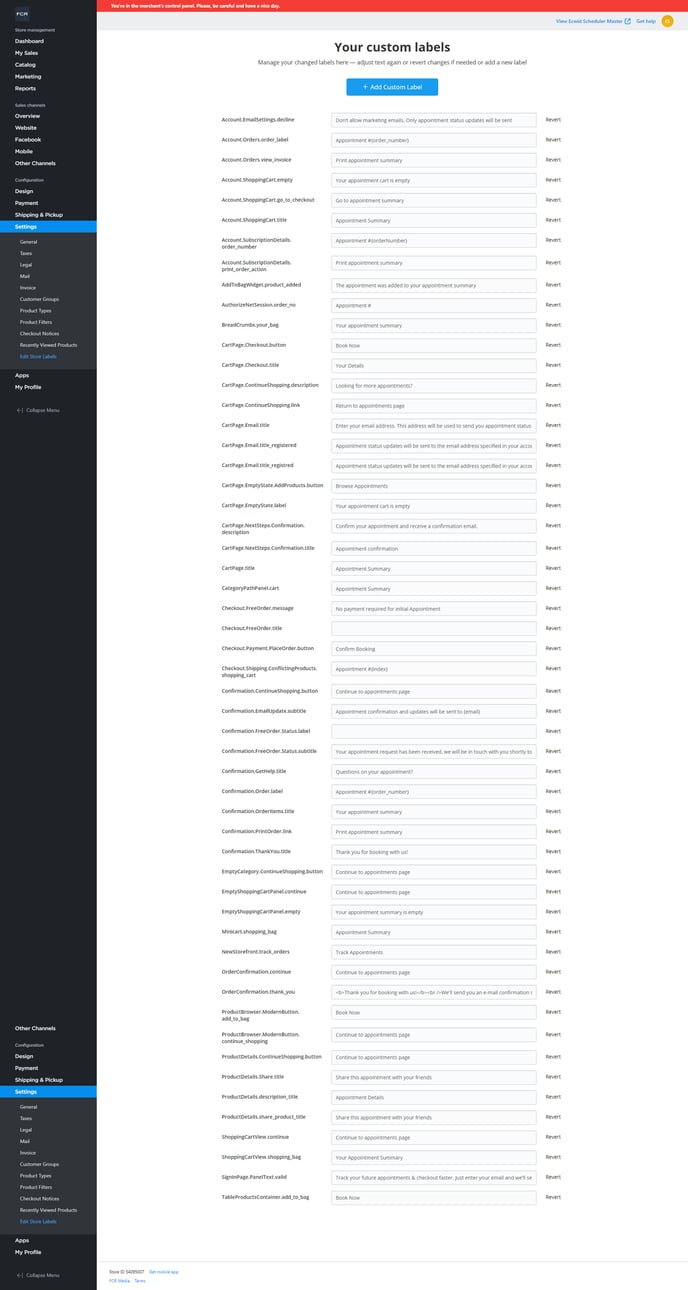
Go to Settings -> Edit Store Labels and change the following labels, here is a text version so you can copy & paste: https://drive.google.com/file/d/14pqvP36qOh4Cbn-dLLX1PEK1vQbzu2J8/view?usp=sharing
Go to Design and use the following settings:
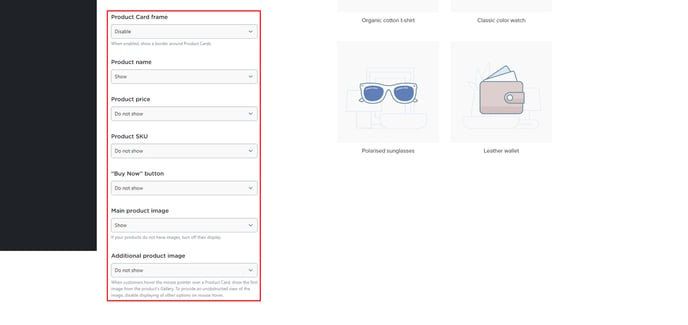
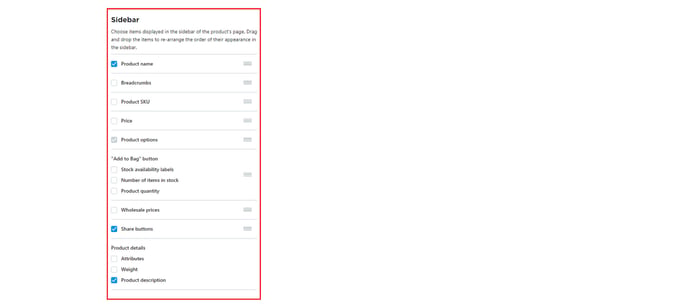
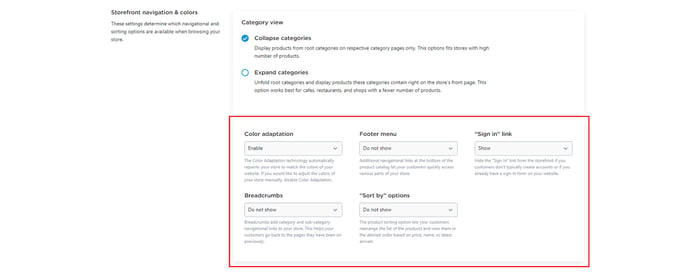
Scroll to bottom of Design page and click Create theme

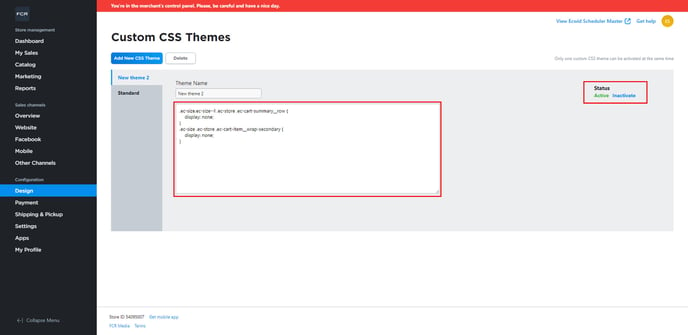
Add this css to the new theme and enable:
.ec-size.ec-size--l .ec-store .ec-cart-summary__row {
display: none;
}
.ec-size .ec-store .ec-cart-item__wrap-secondary {
display: none;
}
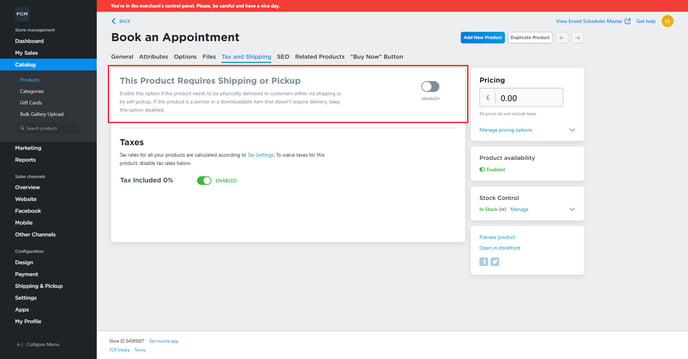
Go to Catalog -> Products and for each product click into it, go to the Tax and Shipping tab and disable Shipping
