When your customer places an order, all details are recorded in your store Control Panel → My Sales → Orders. This article explains how to manage orders in your store.
In this article:
- Understanding order statuses
- Abandoned carts: bring your customers back
- Editing orders
- Creating orders
- Printing orders
- Sales reports
- Exporting orders
- Changing order numbering
Understanding order statuses
Every order one status for payment and another for fulfillment. The payment status shows the state of the order’s payment while the fulfillment status shows the stage of processing.
Payment statuses
A Paid orders status means your customer selected an online payment option and the third-party provider processed the payment. Prepare this order for shipping and ship it right away!
An Awaiting Payment order status means can mean one of two things:
- Your customer selected an offline payment and you need to contact them to arrange payment.
- Your customer’s online payment was not processed. In this case, you can contact the third-party payment provider who processed the transaction or reach out to our support team.
A Cancelled status indicates the payment gateway could not authorize or charge the customer's credit card or you have cancelled the order.
A Refunded or Partially Refunded status indicates the payment (or a portion of the payment) has been credited (returned) to the buyer.
In addition to updating the order’s status in store, you must transfer the appropriate amount to your customer using your payment provider to refund an order.Fulfillment statuses
Awaiting Processing is the default fulfillment status for all new orders, indicating you have not yet started working with the order.
Processing indicates the order is in process, but is not yet fulfilled.
Ready for Pickup indicates the order is ready for your customer to physically pick up the product from your store.
Shipped indicates the order has been shipped.
Often confirmed by a tracking number, Delivered. indicates the shipping provider has delivered your customer’s order.
Will not deliver is reserved for orders you will not ship. You can use this for orders that have Cancelled or Refunded payment statuses.
Returned is reserved for orders your customers returned.
Abandoned carts: bring your customers back
According to the Baymard Institute research, about 70% of online customers who add products to a cart leave without buying anything. You can mitigate this loss with the Abandoned cart recovery feature. Our data shows a third of customers who did complete their order return to your site with this feature.
Editing orders
Sometimes you need to change information in completed orders. With Order Editor feature, you can:
- add and delete items in your orders;
- change the product details (SKU, name, quantity and price)
- edit the customer’s address, name, and email;
- add and delete discounts;
- change the taxes and shipping costs.
Creating orders
You can accept orders via phone or email to sell both online and offline. Record these orders in your store Control panel → My Sales → Orders and keep track of them.
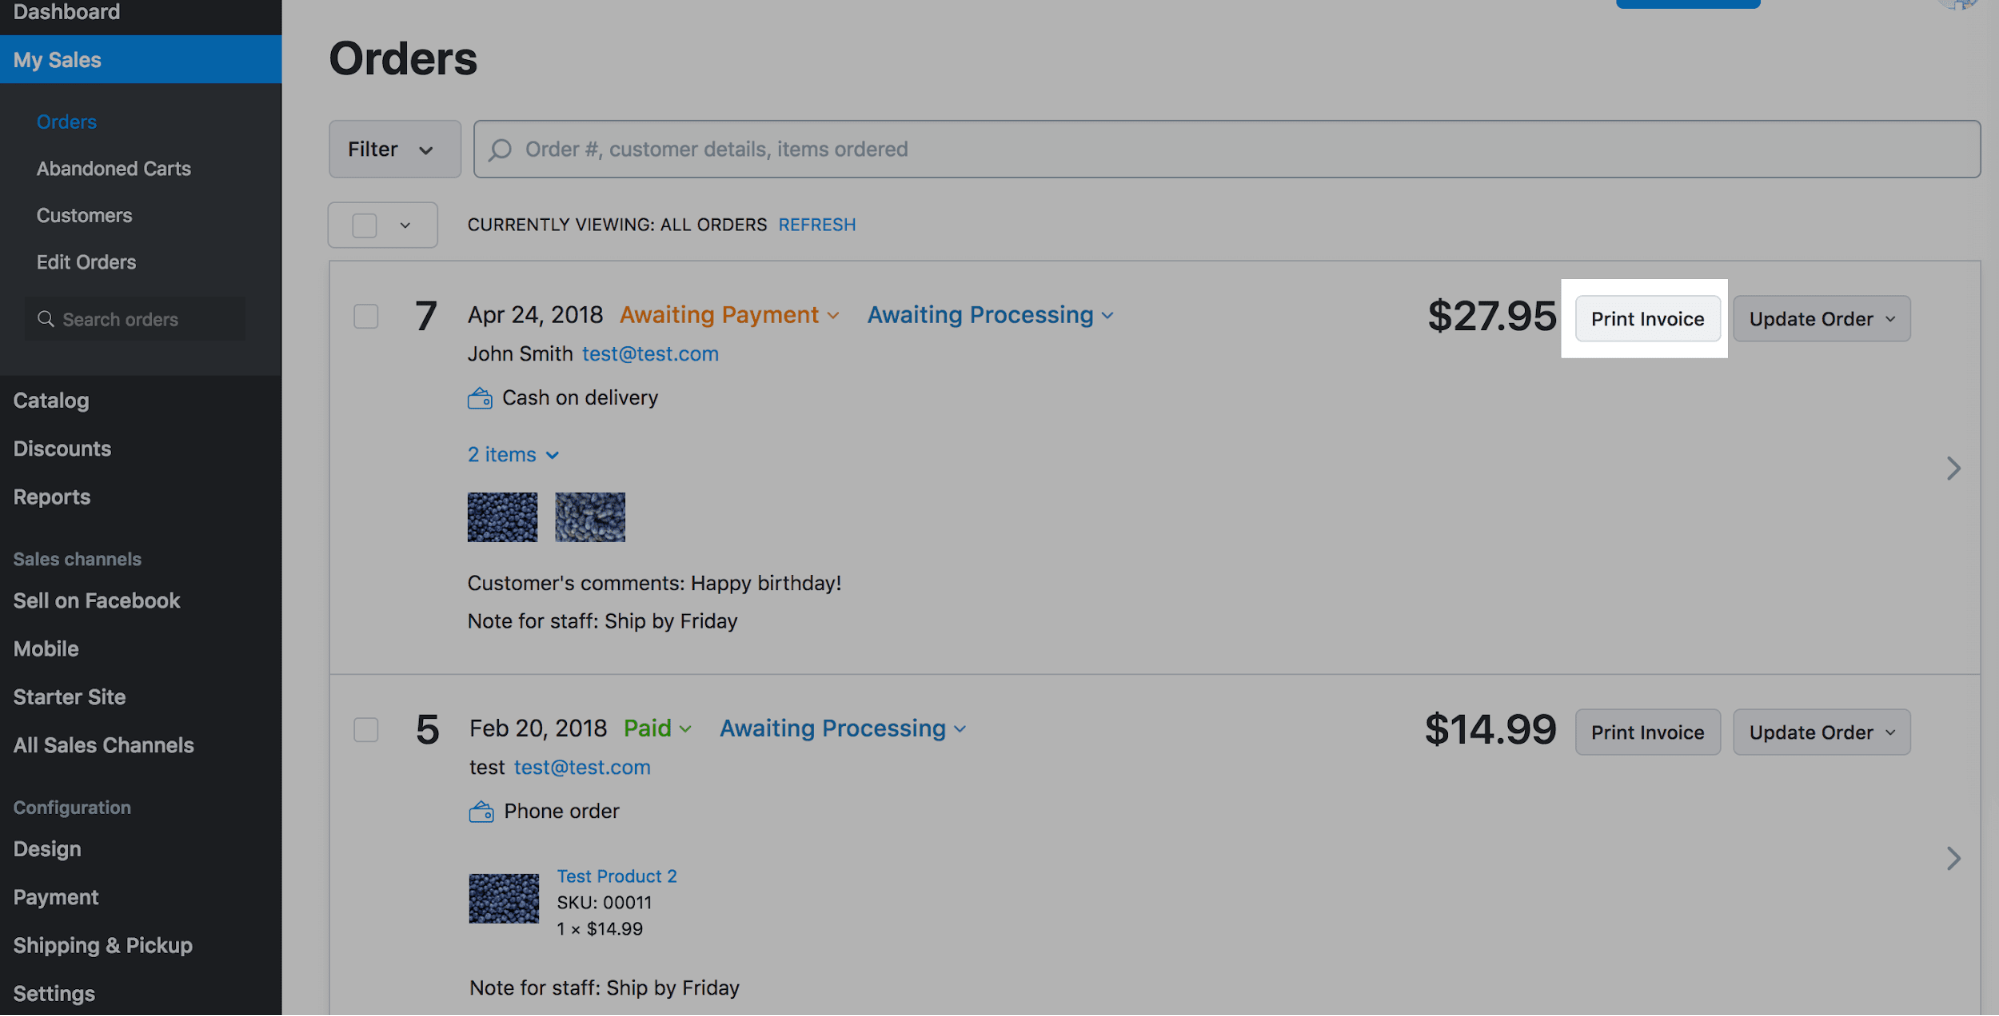
Printing orders
You can print orders individually or as a batch in yoour store Control Panel → My Sales → Orders.
Click Print Invoice next to an individual order:
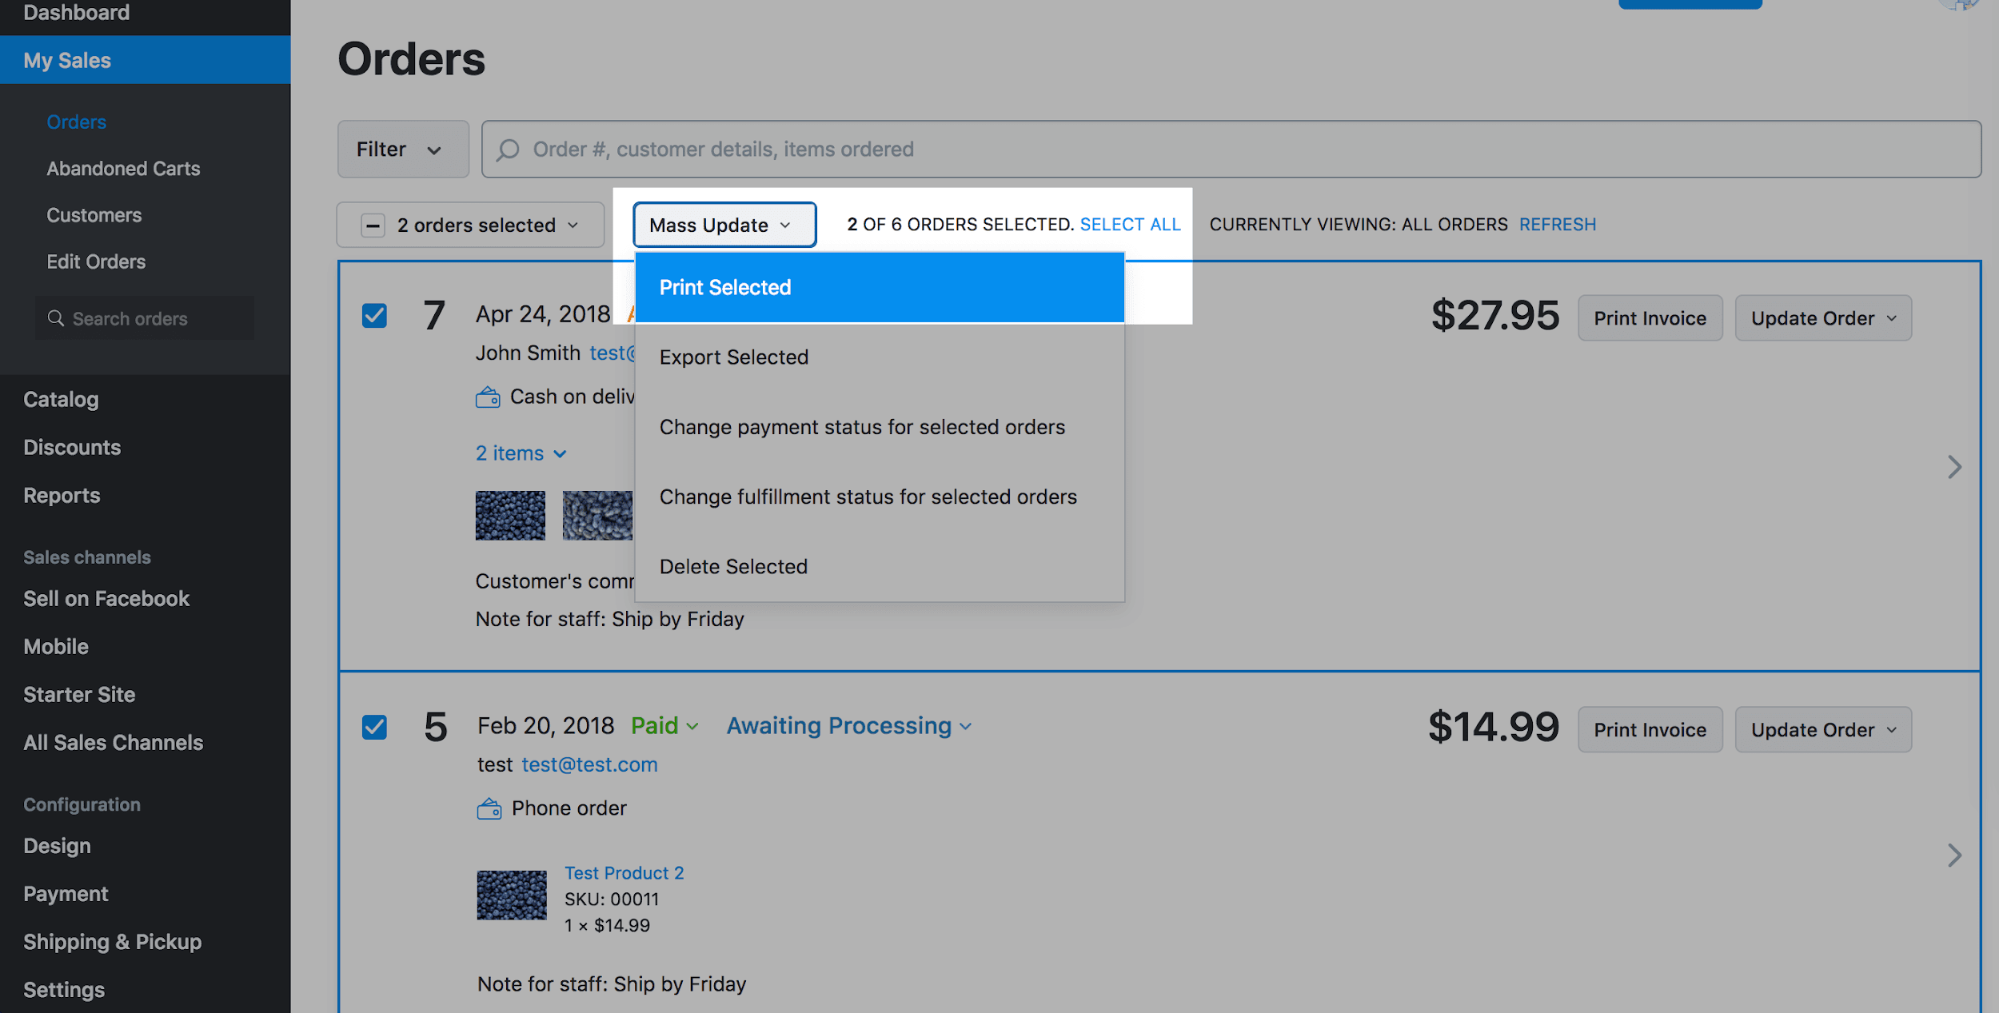
You can also print a batch of orders by checking them and clicking Mass Update → Print Selected:
 You may also use special apps for editing and printing invoices, packing slips, sales receipts and shipping labels.
Sales reports
You can use Google Analytics, data from a CSV file, or tools in App Market to create sales reports based orders from your store.
Exporting orders
To create a sales report, analyzing your orders, or just send the list to your employees, you can export order information to a spreadsheet. It just takes a few steps.
- Go to Control Panel → My Sales → Orders.
- Scroll to the bottom of the page and find the Export Orders block:
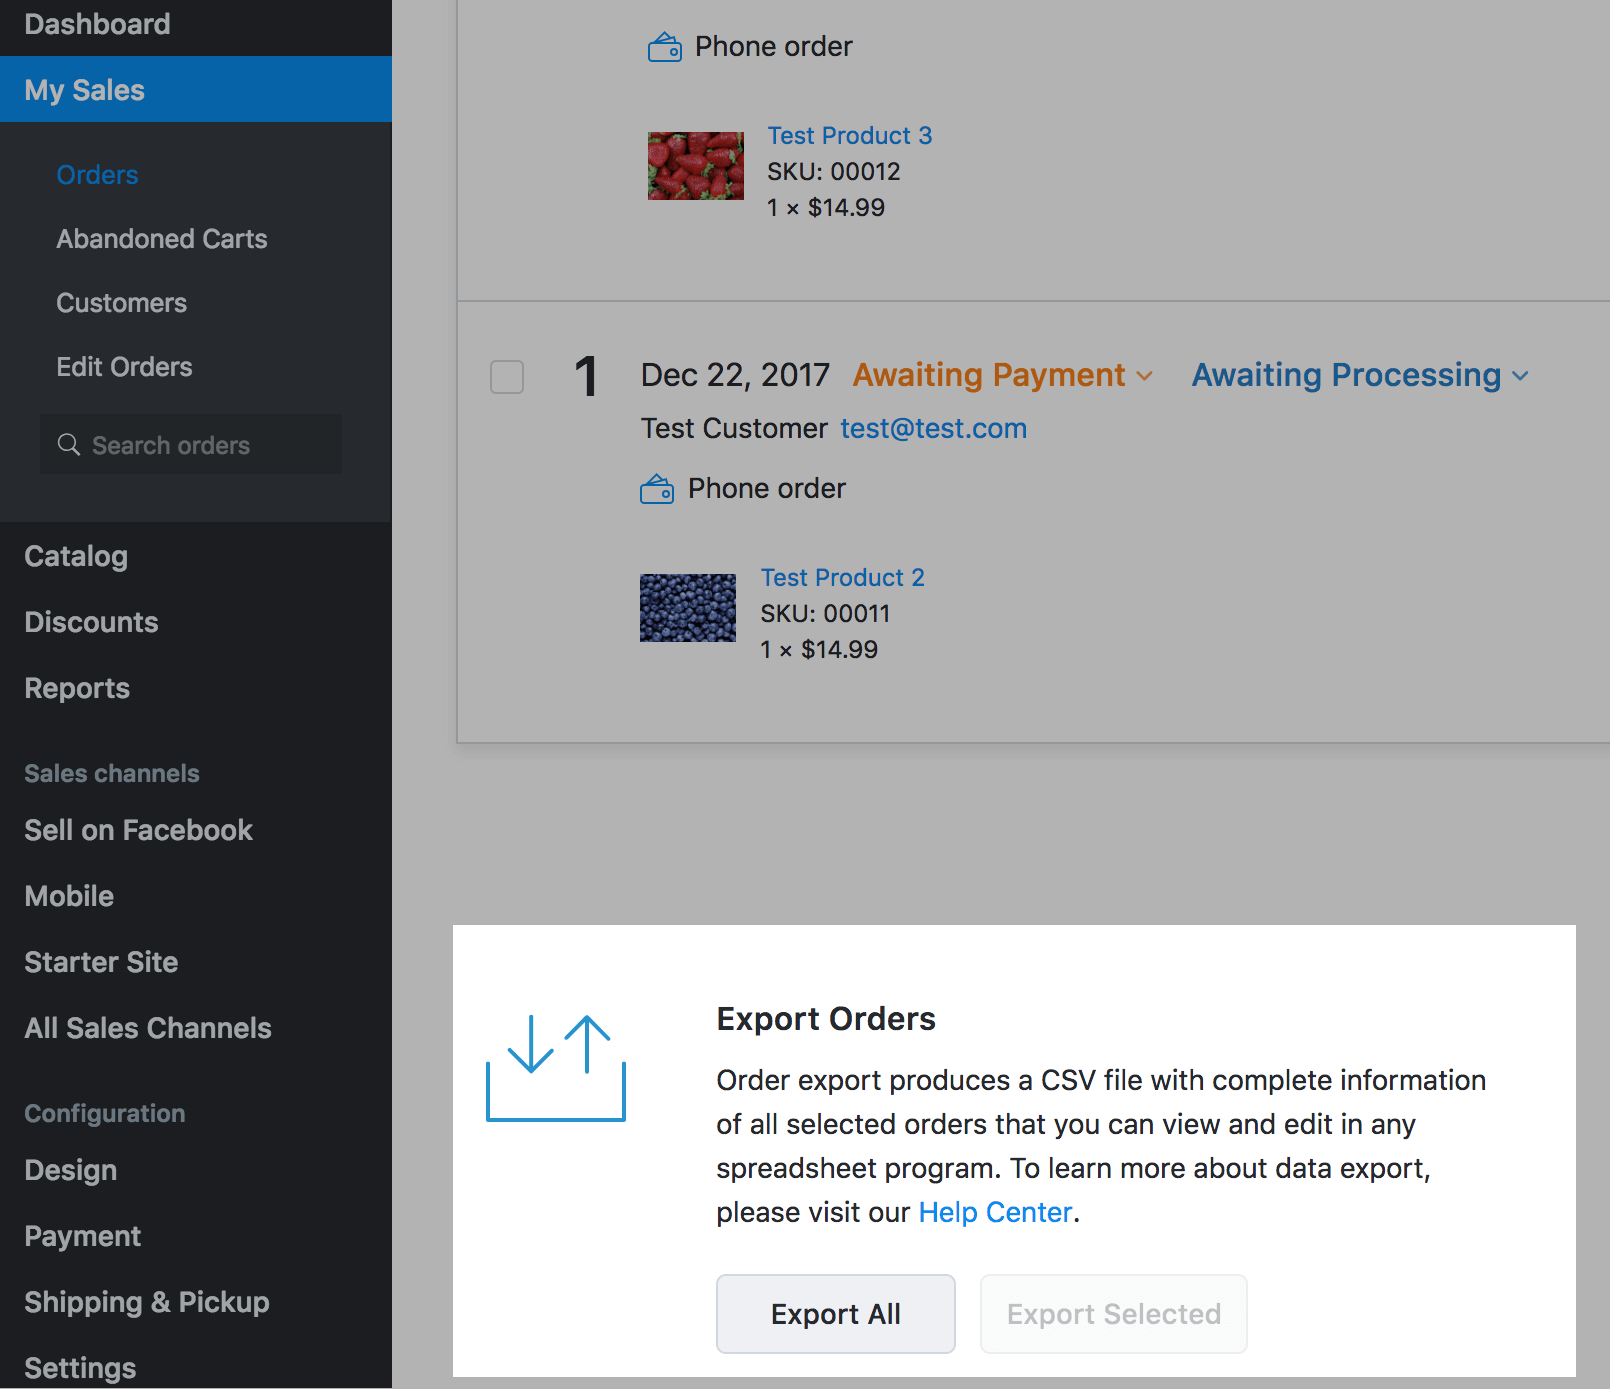
- If you want to export all of your orders, click Export All.
- To be selective, tick the ones you need and click Export Selected.
- You will see a popup with the export settings.
- Select the delimiter :
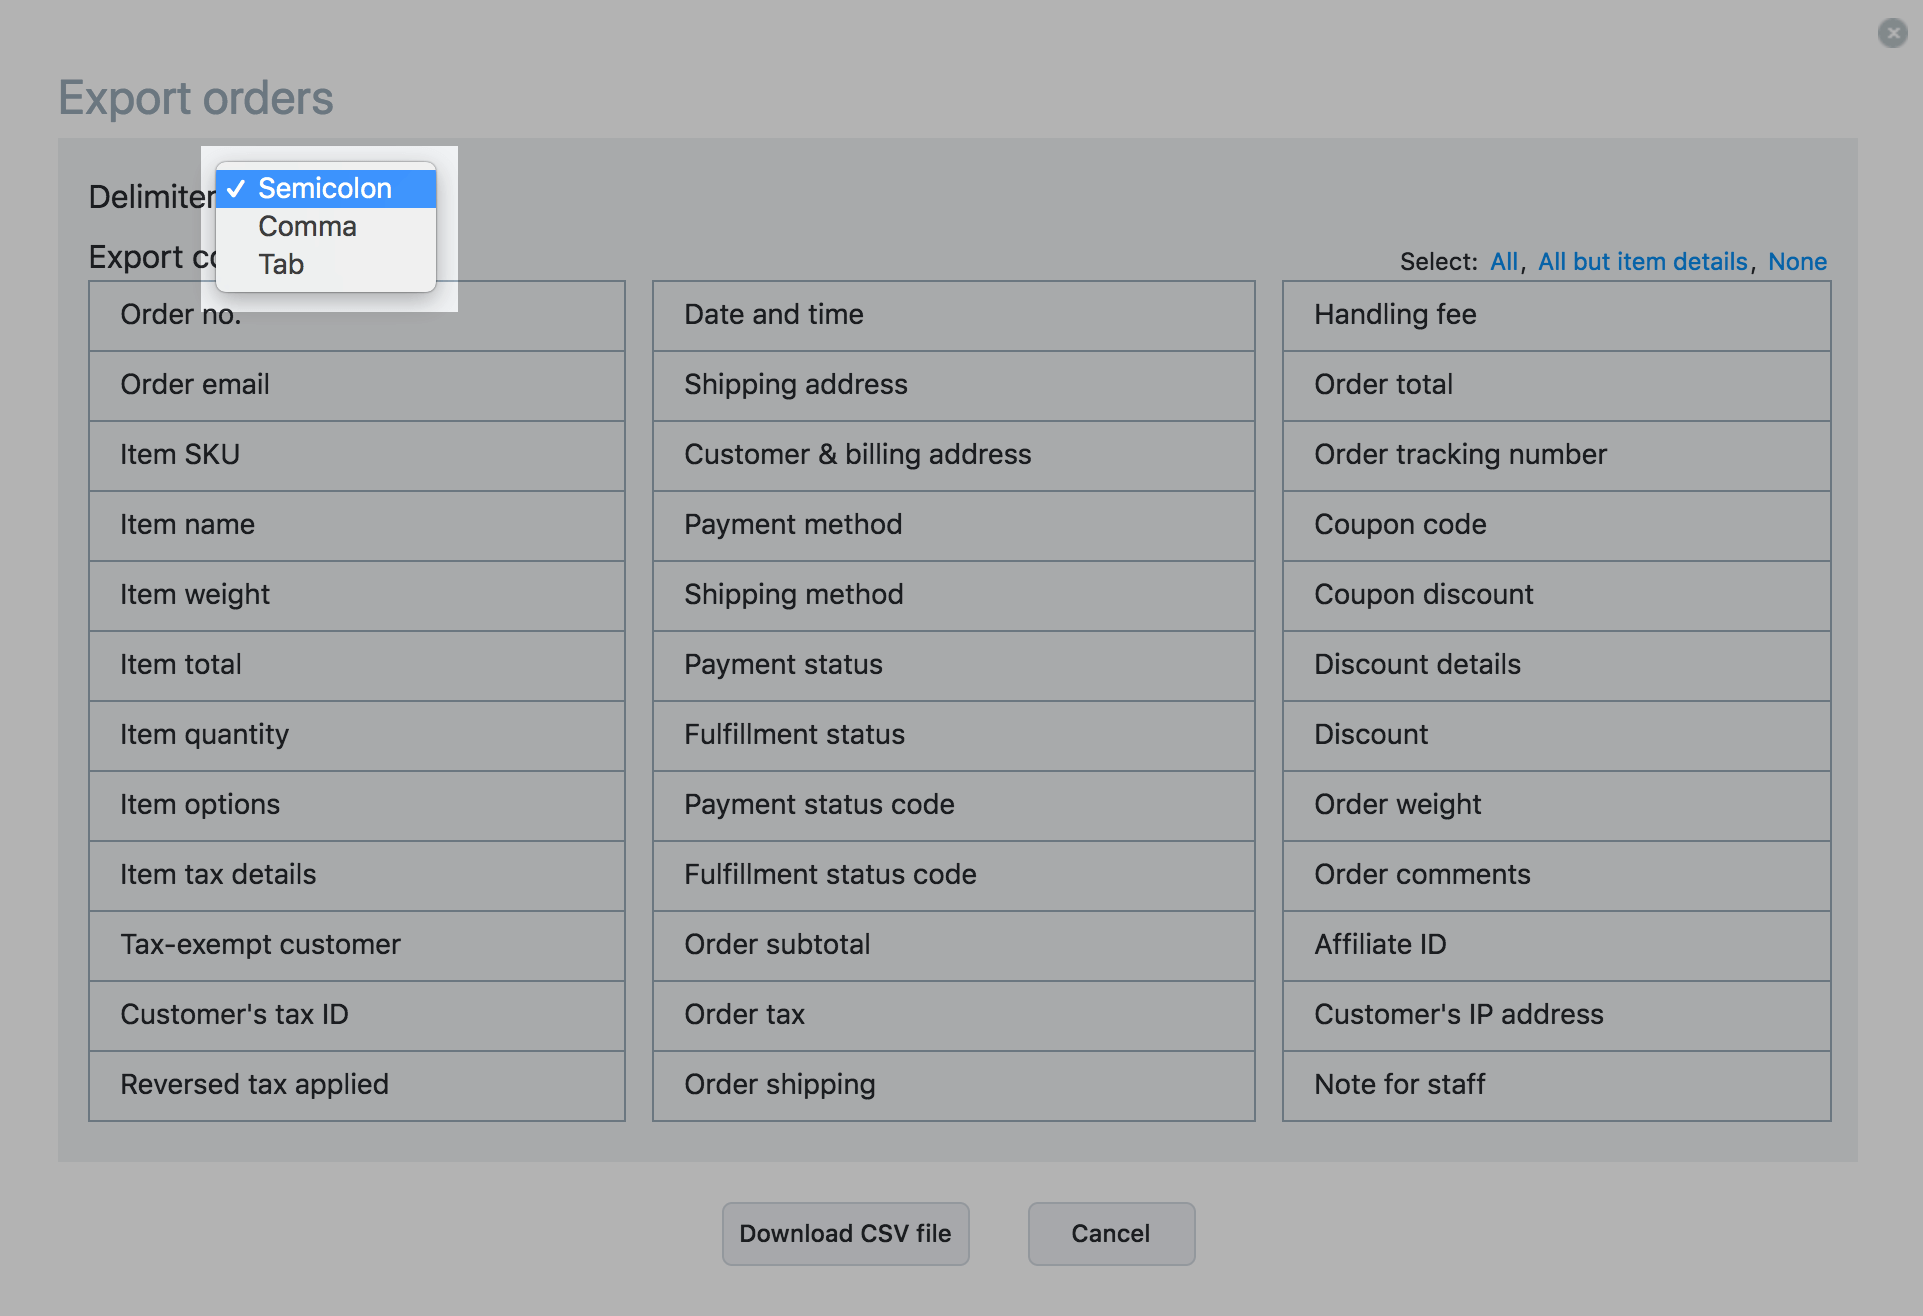
- Select the columns you want export. By default, all the columns are selected.
- Click Download CSV file.
- Open the downloaded file with a spreadsheet editor for further use. We recommend OpenOffice, it is free and does not corrupt CSV files.
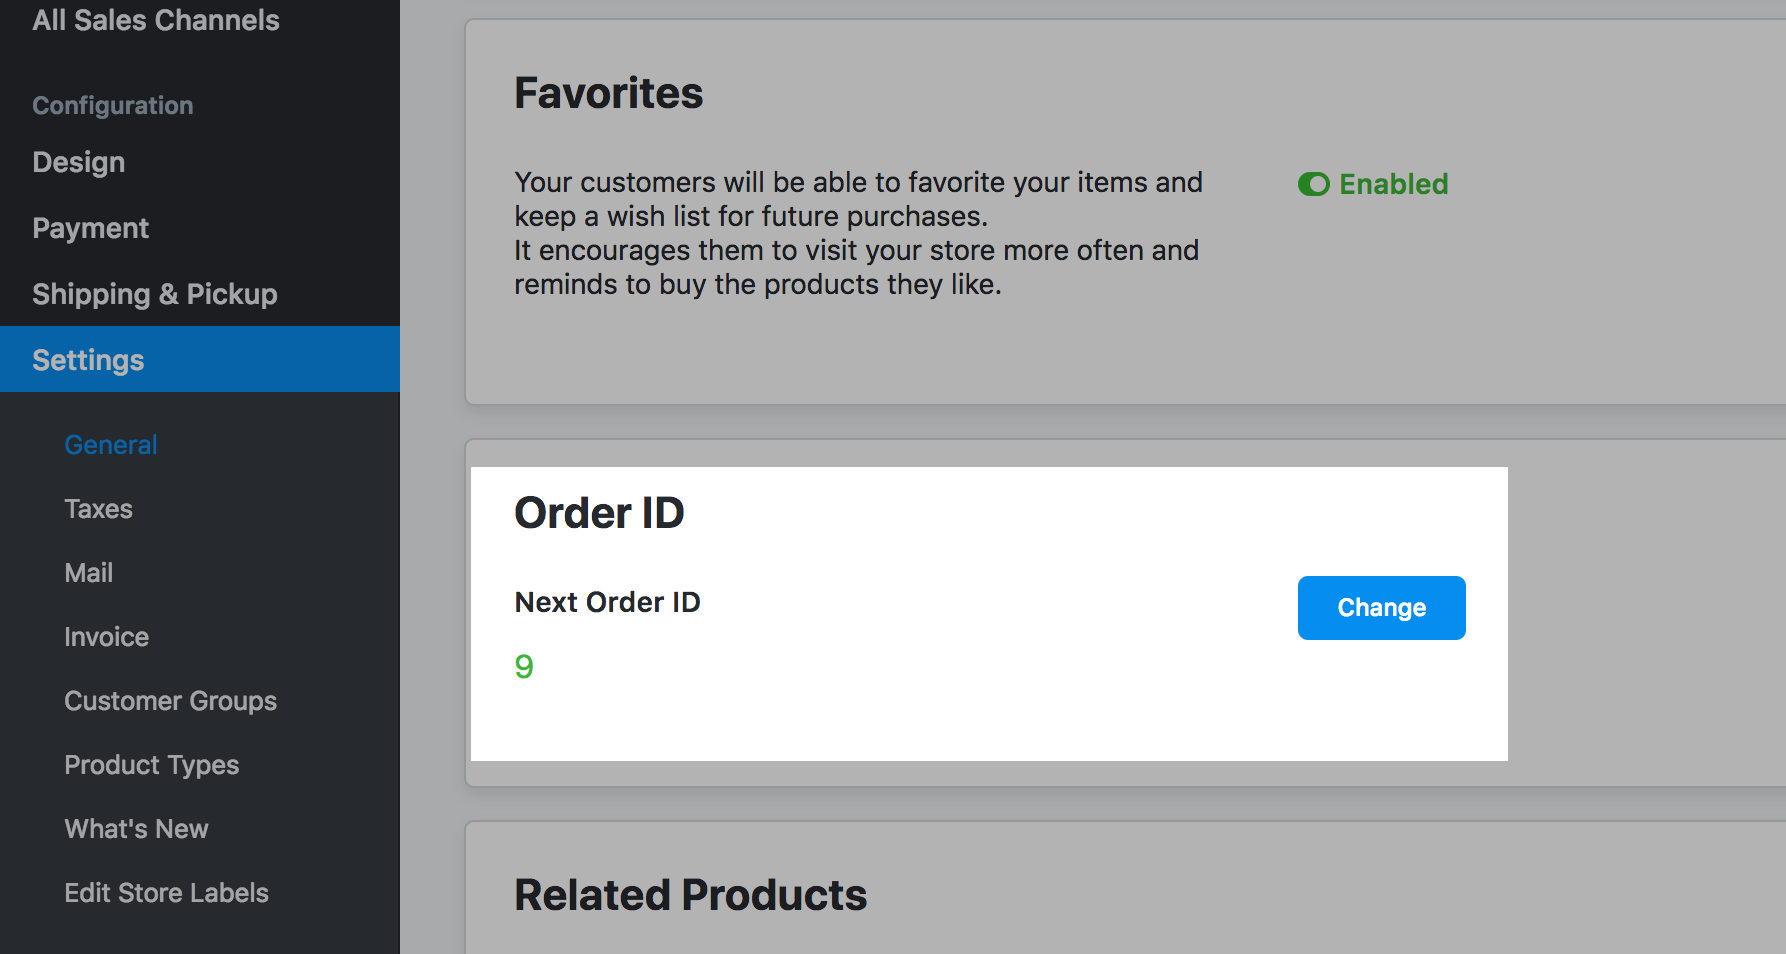
Changing order numbering
By default, your order IDs are numbers starting from one. You can change the Order IDs in your store by adding some letters or by starting from a higher number.
If you do not want to show that you have a brand new store with no order history, start your IDs from 1000.To change the Order IDs in your store:
- Go to store Control Panel → Settings → General → Cart & Checkout.
- Scroll down to Order ID.
- Click Change:
- Enter a number that you wish to serve as your next order’s ID:
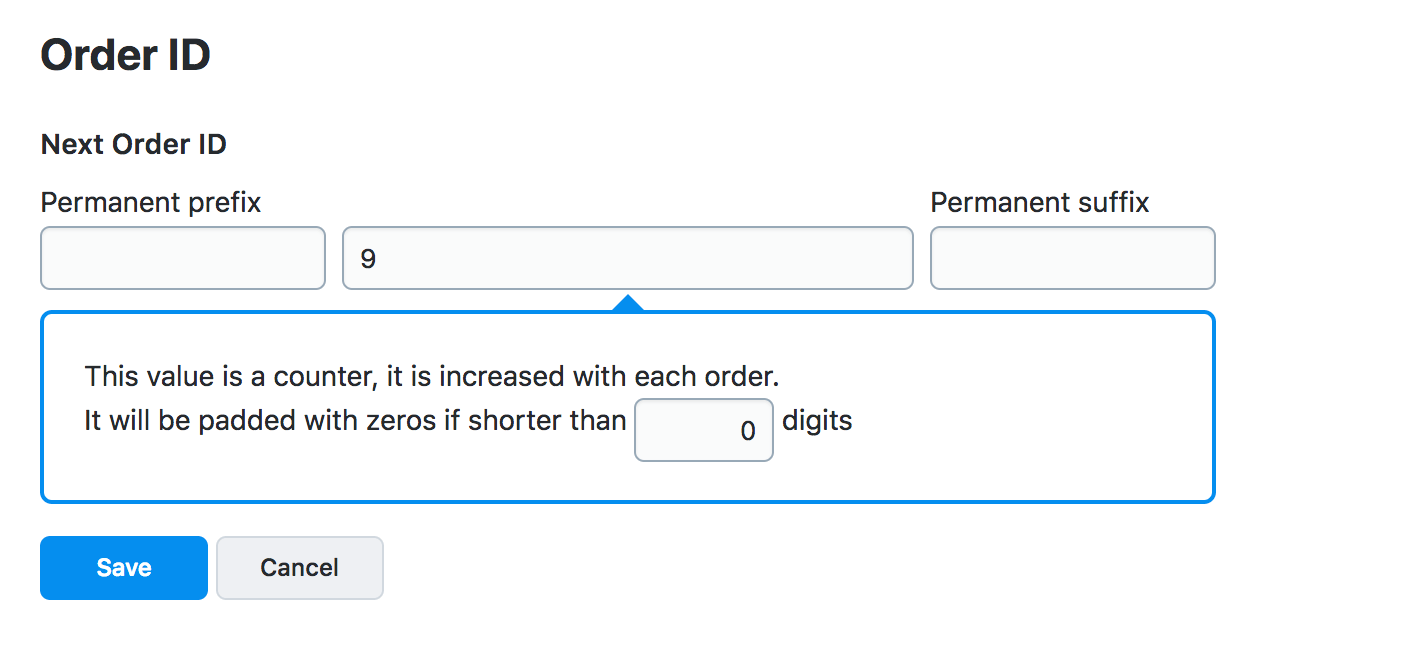 You can only increase the ID number from your Control Panel. To decrease the order ID or set it to zero, please contact our support team.
- In some cases you might want to add a prefix or suffix to your IDs. These additions stay the same for all of your orders. Some find it helpful to add information about the orders right in their IDs. For example, MyStore1-1006-2018 can include your store name and year using a prefix (MyStore1) and suffix (2018):
