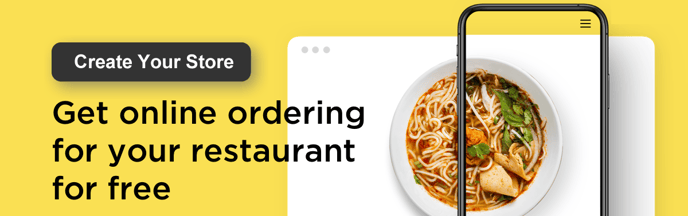
ShopNow is an e-commerce platform that you can use to quickly move your restaurant business online — start taking online orders, accept contactless payments, and offer a curbside pickup and/or delivery to your customers.
Your customers can order delivery online from both mobile and desktop platform, and either pay you in-person or prepay online with a credit card. Additionally, we have a number of features that keep customers coming back, including automated emails with tailored messaging to engage your customers, discount coupons that you can share with your customers, and loyalty rewards to thank your regulars.
Follow the steps below to quickly launch online ordering and start accepting food orders through your website.
Step 1. Start your online store
 Begin by getting a Free ShopNow store- it's free!
Once you have signed up, you will get an online admin panel with a sample catalog. In your ShopNow admin panel you can set up and manage online food ordering using any device connected to the internet.
Step 2. Add online store to your website
If you have a restaurant website, you can easily add your ShopNow Online Store For example, you could add an Online Orders page to your site. Then continue setting up your online store and preview the changes right on your website.
You can also use a free free ShopNow Instant Storefront for your restaurant which comes with built-in online ordering. Instant Site is included in available to every account and an online store will automatically be included there. You can use an Instant site on a free subdomain like alexcafe.gpi.ie or you can connect your own domain like alexcafe.ie to your Instant Storefront.
Step 3. Add menu items
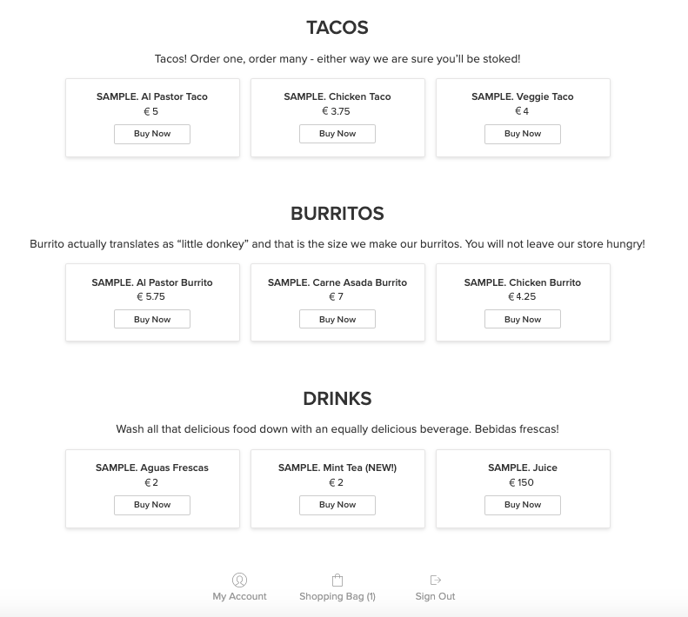
Initially, the ShopNow store will contain sample products to demonstrate how the menu can look.
You will need to start off by removing sample products and sample categories from your catalog and adding your products (meals) by going to your admin → Menu (Catalog) → Menu Items. You can add products now.
For the benefit of a quick setup, you can upload your restaurant's Instagram pictures as your product images and update your menu/product photos anytime later:

You can choose to add your menu items without images by choosing Do not Show for the Main product image option in your admin → Design → Product Card details and layout section
If you need your store to show your customers how much of each menu item is available now in order to prevent them from ordering more than you actually have or can prepare, you can add stock to your products. When products are sold out, they can’t be ordered until you increase their in-stock quantity.
You can also add special items and promotions to your catalog that will allow customers to support your business:
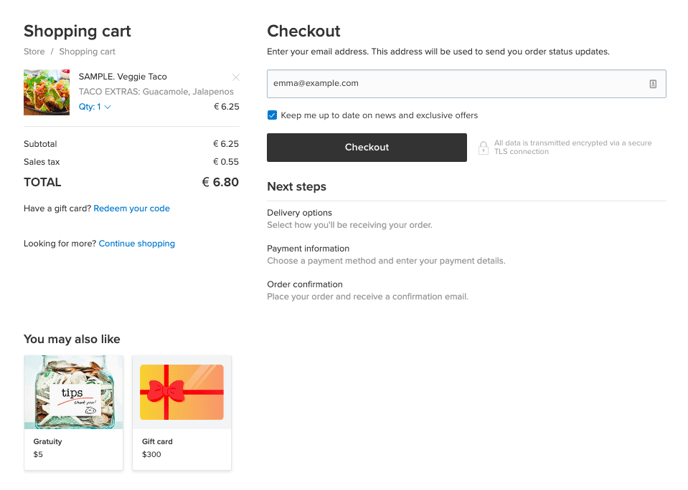
- To give your customers the option to leave a tip, you can create a separate “product” called Gratuity and add different tip amounts as product options: €2, €5, €10, €15. Then show this “product” in other product pages as well as before checkout by relating it to other products. Thus your customers can add both a food to their order and then pay for it all together.
- Along with your regular food products, you can offer digital Gift Cards to your customers so that they can pay you in advance and support your business. Customers can redeem gift cards by entering their codes when they make their next online orders.
Step 4. Add payment options
You can offer your customers multiple choices for how they want to pay for their order:
- You can enable online credit card payments which allow customers to pay for their order as soon as it is placed online. You can use Paypal or Stripe as a credit card processor in your store. Stripe comes equipped with Apple Pay and Google Pay, so your customers can pay online quickly when ordering through mobile devices, too.
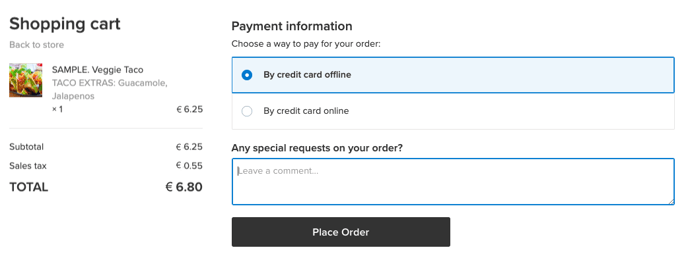
- You can also give customers the option to pay by credit card offline at the time of order collection if you have credit card facilities in your store. alternatively you can opt to accept cash.
- If your delivery personnel use some other contactless POS terminal, you can set up an offline payment method like “Credit Card offline” in your store so that customers can choose it for their order.
Step 5. Add delivery options
You can offer your customers multiple ways to get their order by setting up various delivery options in your ShopNow admin (in the Shipping & Pickup section):
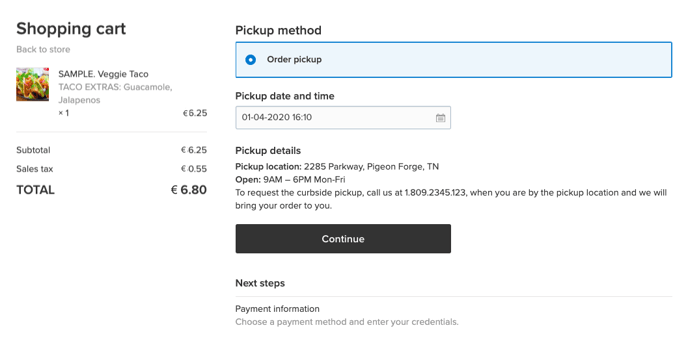
- Set up curbside pickup so that customers can stop by your restaurant, and call you when they arrive, then you can bring them their order.
- Set up free delivery to collect the customer's address when they order online and deliver the order to them when the meal is ready.
You may want to set a minimum order amount for online orders to qualify for free delivery. For example, offer free delivery only for orders over $300. Follow these instructions to set up a free delivery over a certain subtotal.
If you want to offer free delivery nearby but charge for delivery outside of that zone, you can create delivery zones, each covering a certain area. You can then add delivery methods with adjustable rates (zero rate, flat rate, or a rate that depends on the order sum) and then specify which zone each delivery method will apply to.
Step 6. Customize theme
Your ShopNow automatically adapts to the theme of your website so that it looks like a natural part of your site. You can make style changes such as store colors and font, catalog look, and layout of product pages by using the built-in design options and/or by adding CSS to your store theme.
The checkout page in your store can be customized, too. The following settings in your ShopNow admin (Settings → General → Cart & Checkout tab) can be updated so as to be more useful for effective communication with your customers:
- You can make the Phone Number field required so that you can call a customer to quickly go over their order details or inform them that their order is on its way.
- You can rename the Any special requests on your orders? section to gather more specific information from your customers. For example, you can use this section to ask how many people their order is for. For this you can create the custom heading for the Order Comments section.
You can also re-name the buttons in your store, such as changing Buy Now to Order Now or Add to Bag to Add to Order. It is easy — learn how you can change text labels in your storefront.
Step 7. Personalize emails
To personalize your emails, go to Settings → Mail and review the email notifications that your customers receive after they place their orders. You can customize the emails, if needed.

You can also set the email address where you want to receive notifications about new orders, if it is different from your ShopNow account’s email address.
Step 8. Announce online ordering
It’s time to let your customers know that you are now taking online orders. You can:
- Describe how the online ordering works in the welcome text on your online store.
- Promote your service in your local communities and on your social media platforms.
You may want to give your customers a detailed description of how online ordering works in your restaurant — what protective measures you take to keep customers safe, what days and times foods can be ordered, how to use contactless payment for orders, and how to get their order with less person-to-person interaction. You can also let your customers know how they can leave tips and how they can support your business through a gift card purchase.
Step 9. Process your online orders
When your first order comes in, you’ll get a New Order notification by email with all order details. Now you can start processing the orders — prepare the meal, deliver it to the customer, etc. All placed orders are listed in your admin, My Sales → Orders.
You can quickly learn about new orders when you are in the restaurant kitchen or on the go with the help of the ShopNow mobile app for iOS and Android. As soon as a new order comes in, you will see a push notification in your mobile device (and hear a “cha ching” sound), plus you can print out the order details directly from your mobile device so you can start preparing the food.